Getting Started
1. Installation
- Download the executable file in line with your set-up (macOS, Windows, Linux) from the latest release and double click on it to install the application.
- On Linux and Windows, double click on the application to launch the desktop wallet. On macOS, you'll need to go to the Application folder, click right on the Alephium app and then click on Open (don't double click, it won't work unless you allow it from the System Preferences).
2. Create Wallet
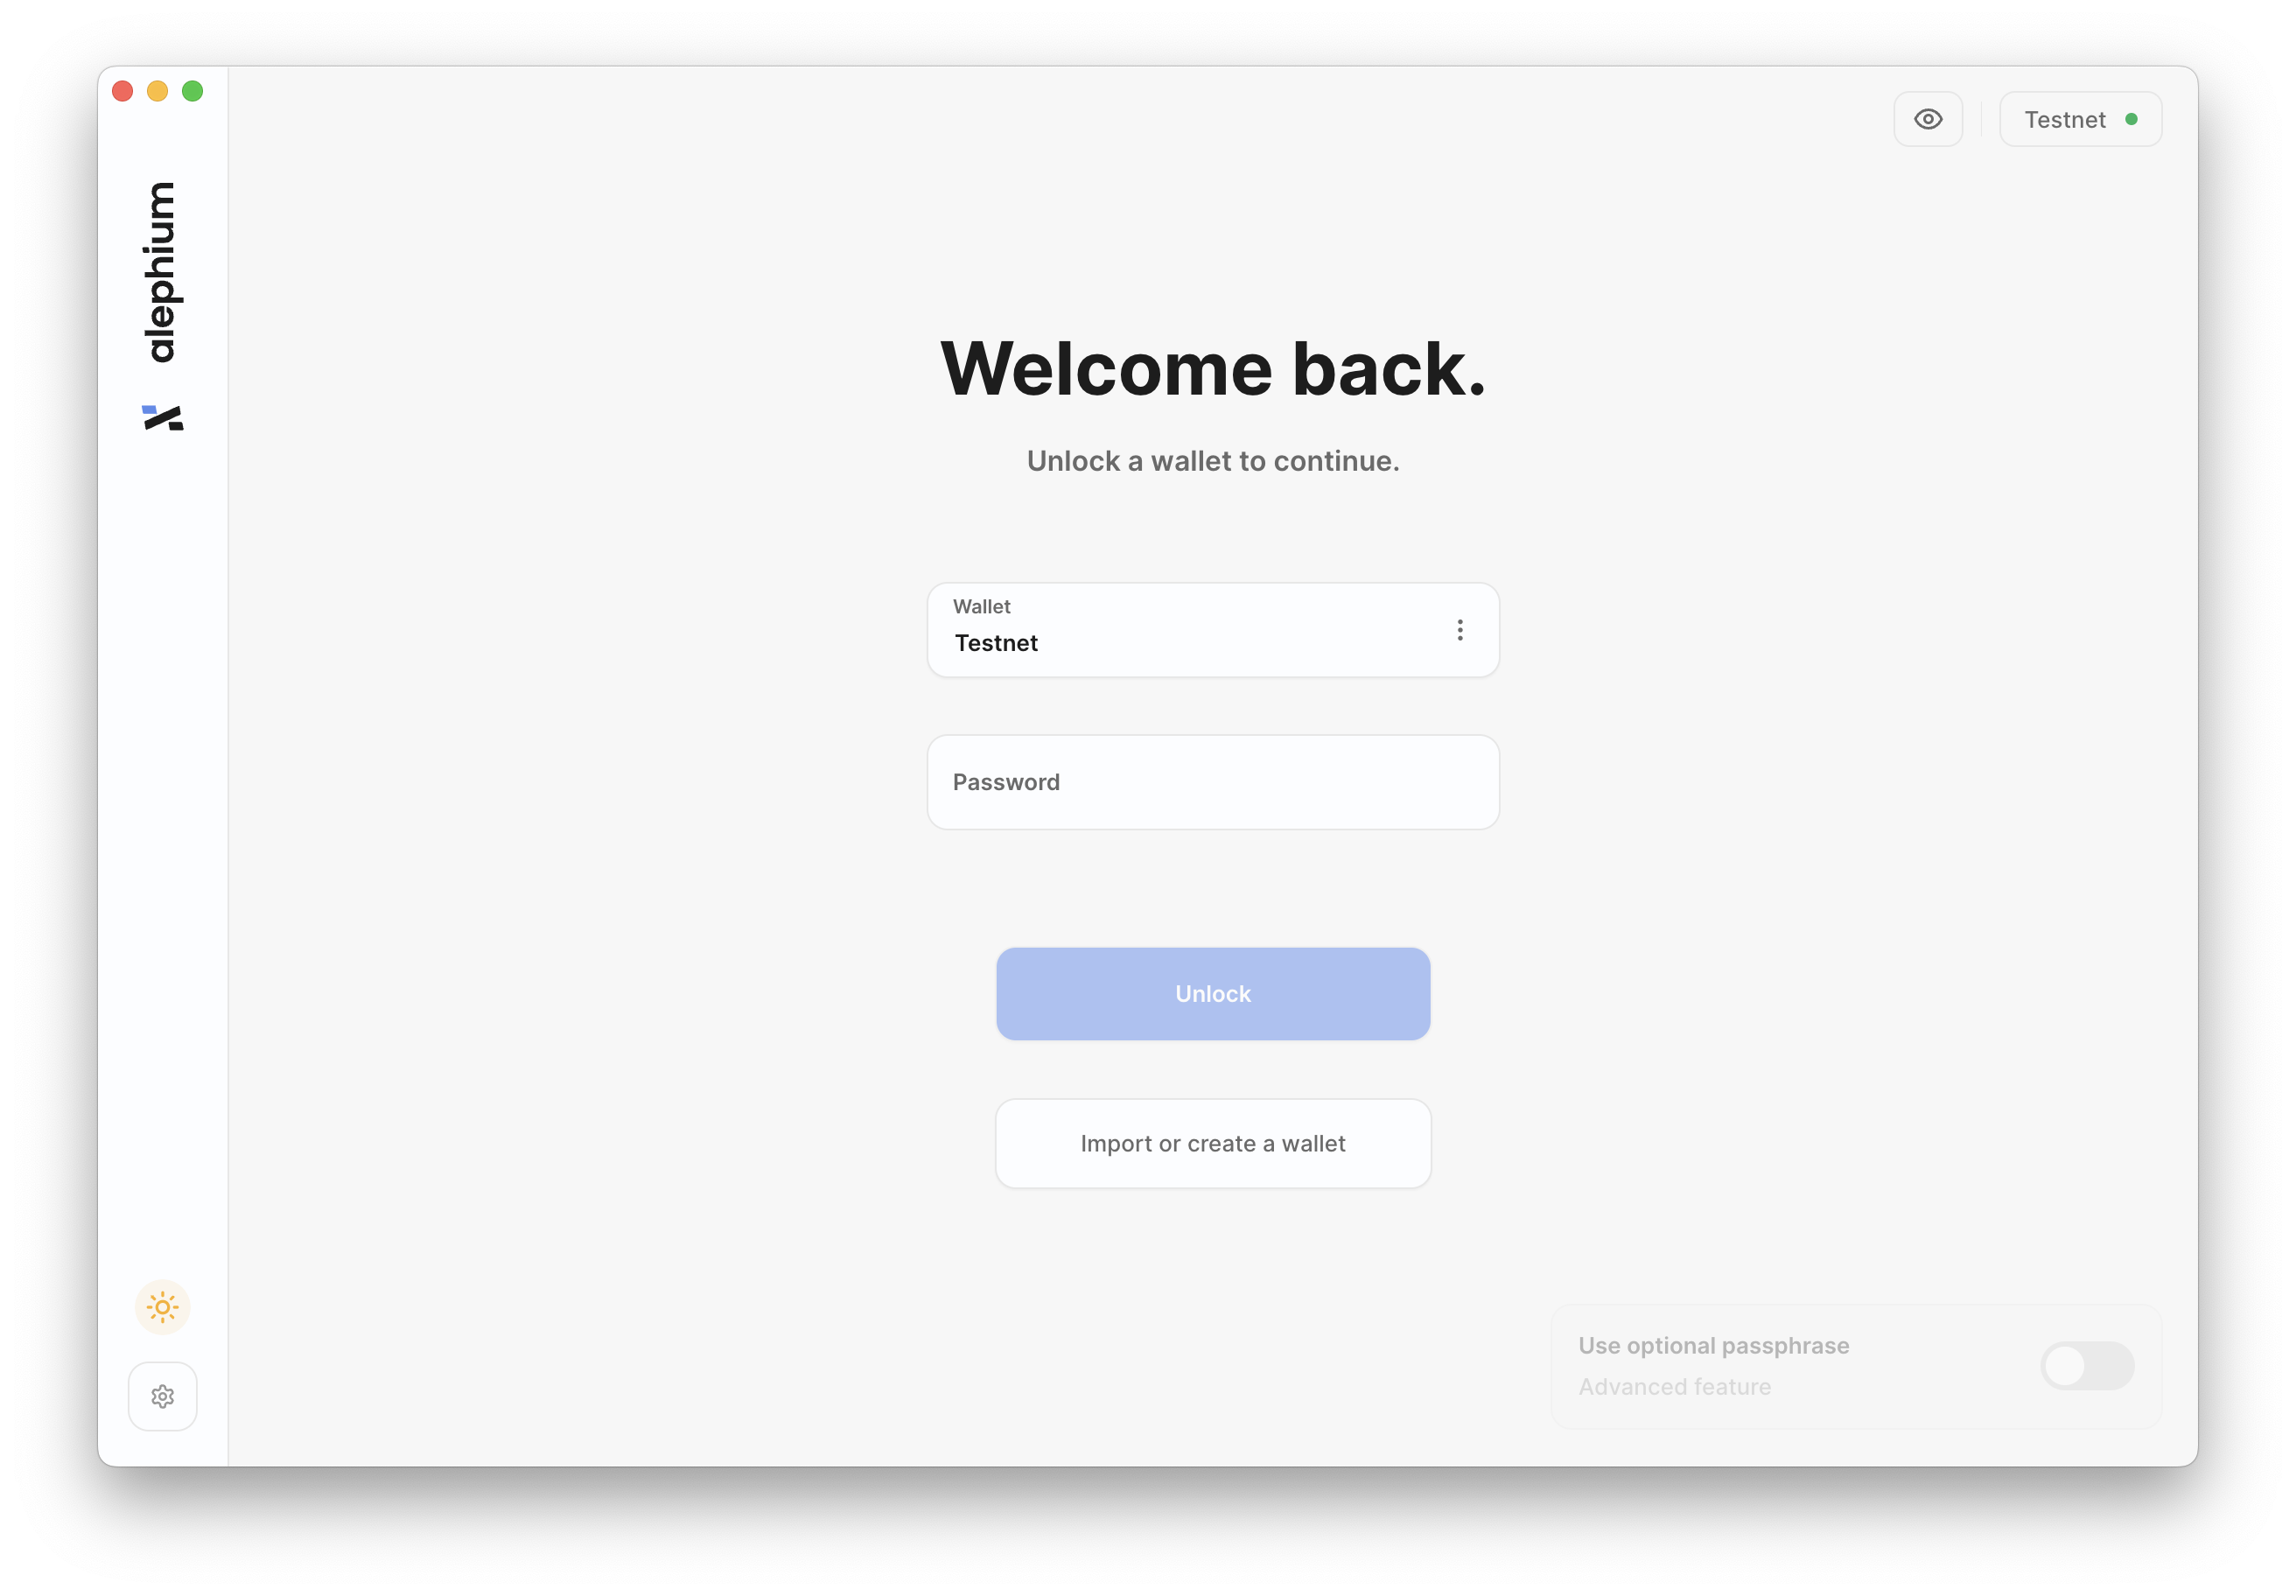
By default, the wallet will be connected to the Alephium public node. Should you want to use your personal node or generate the wallet offline, you can do so by clicking the setting wheel on the top right of the app and changing the Node Host to your localhost or simply leaving it blank to create the wallet offline.
-
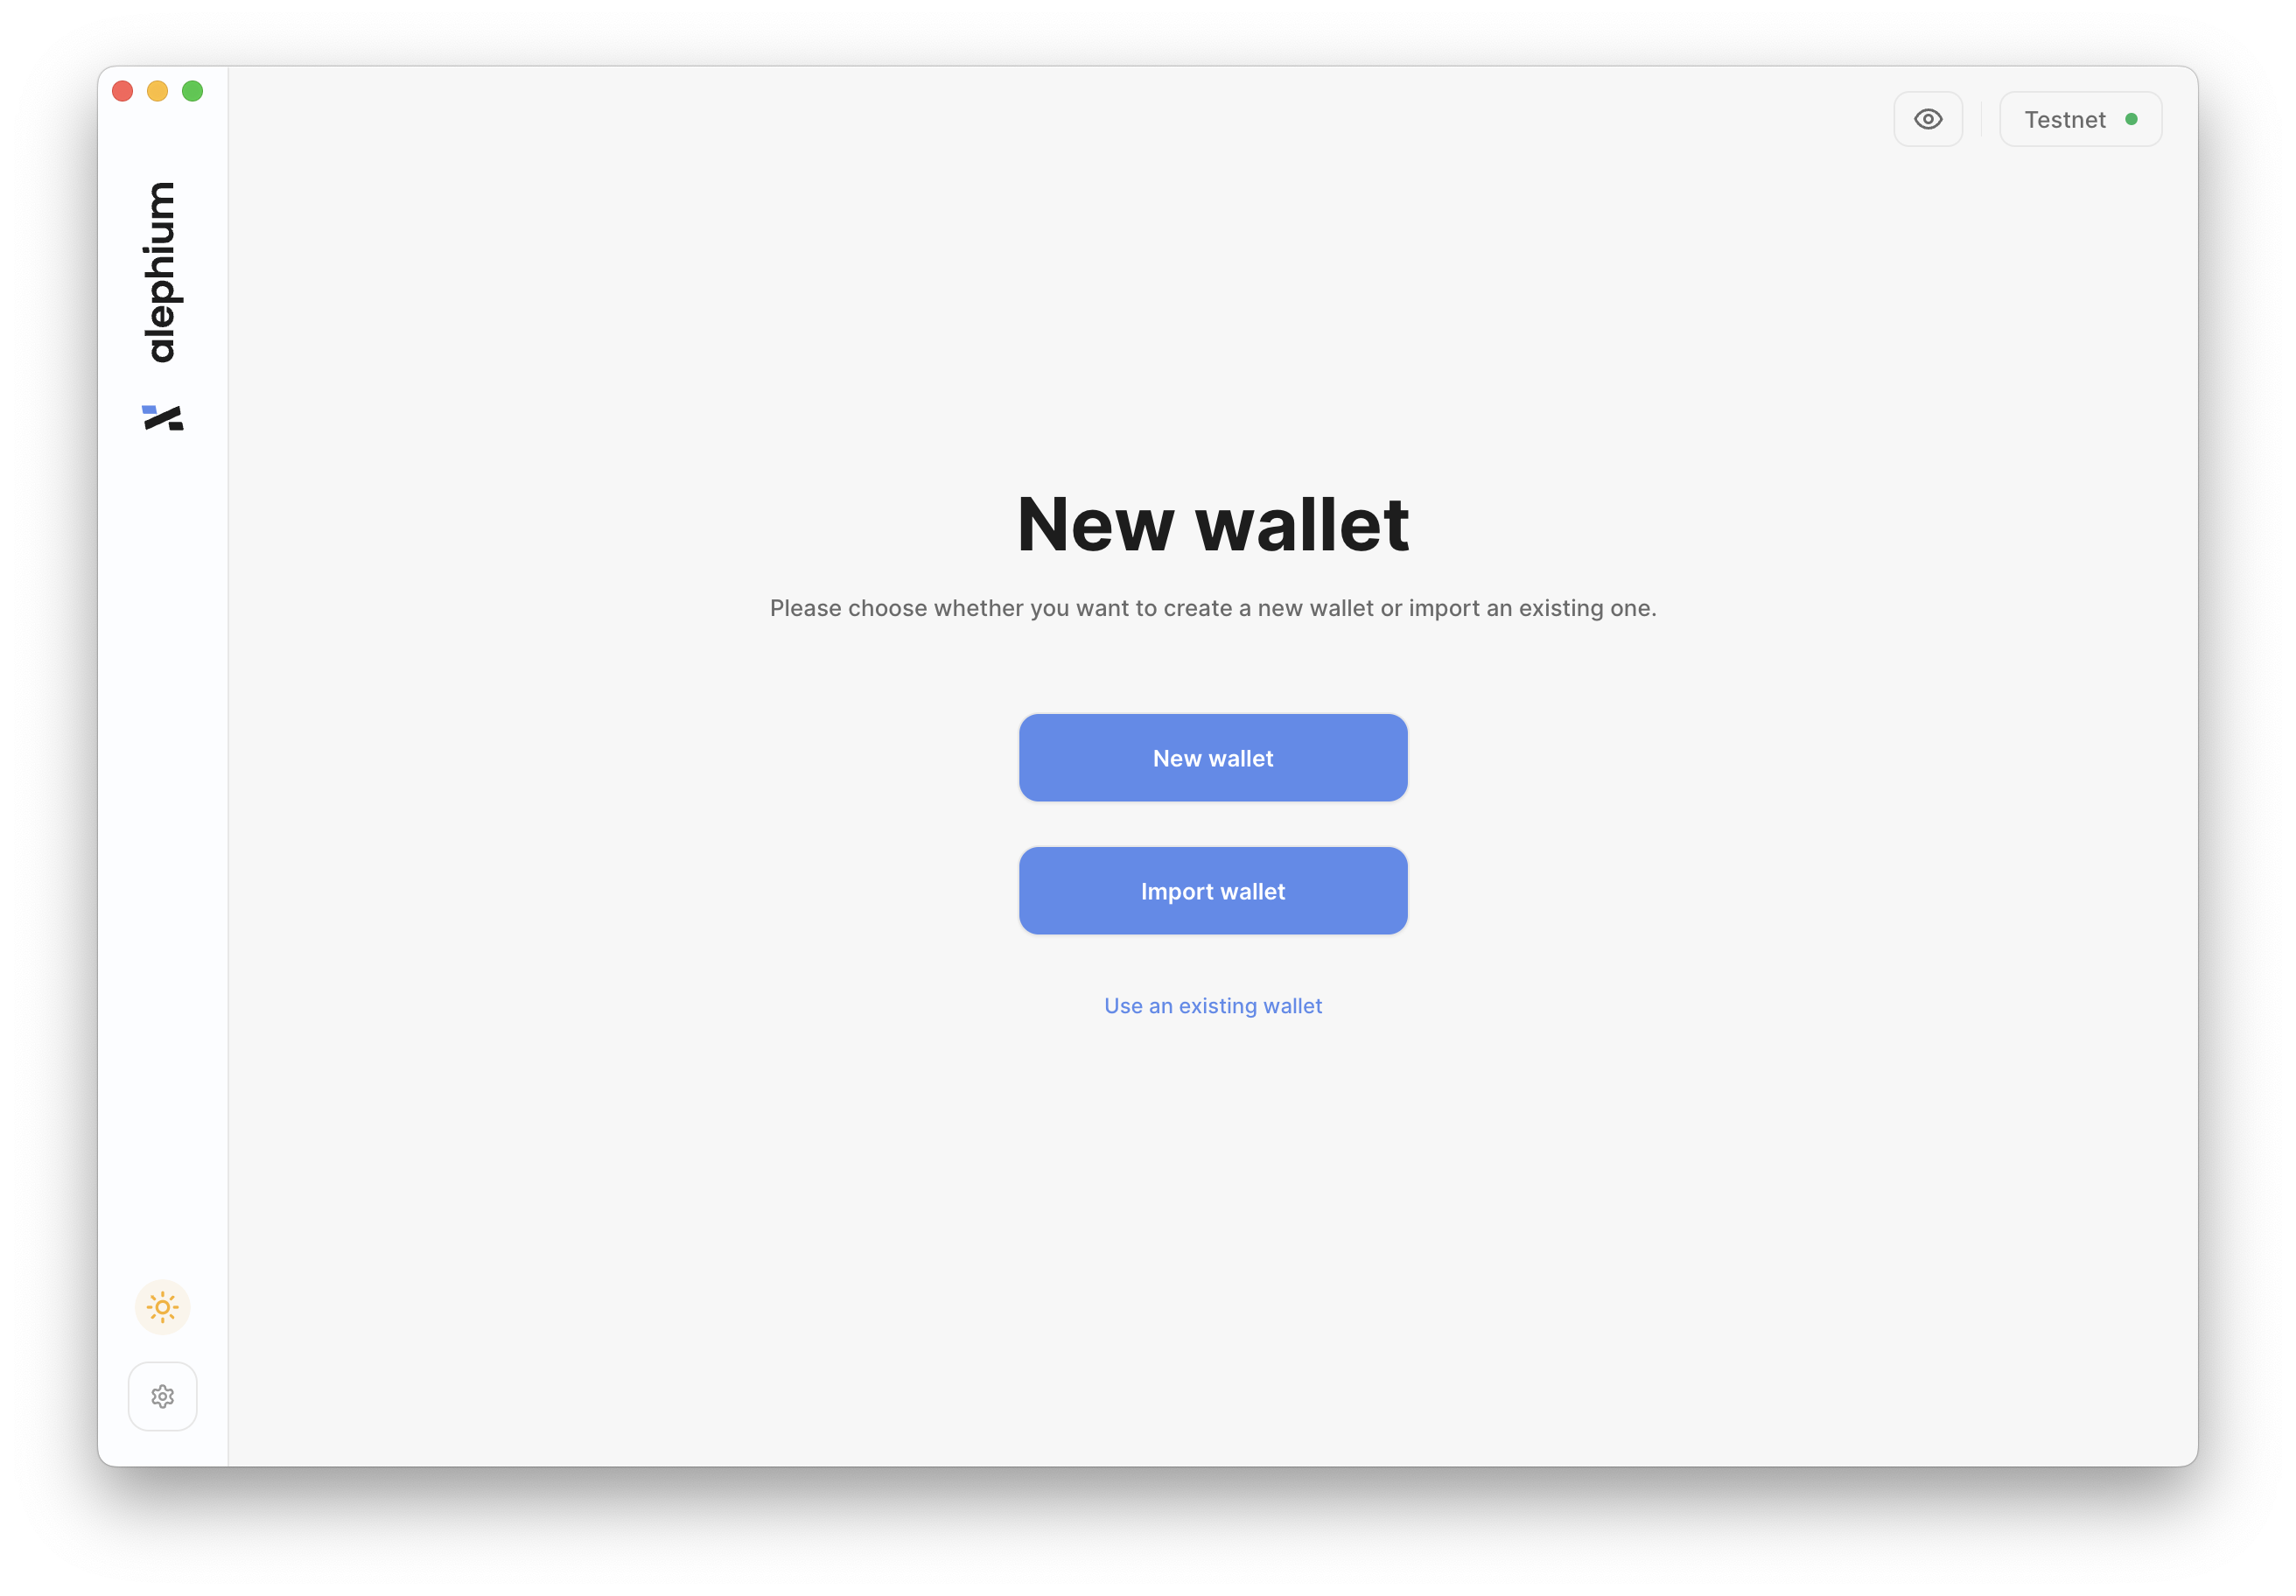
Click on
Create/Import a new wallet, then clickNew wallet. -
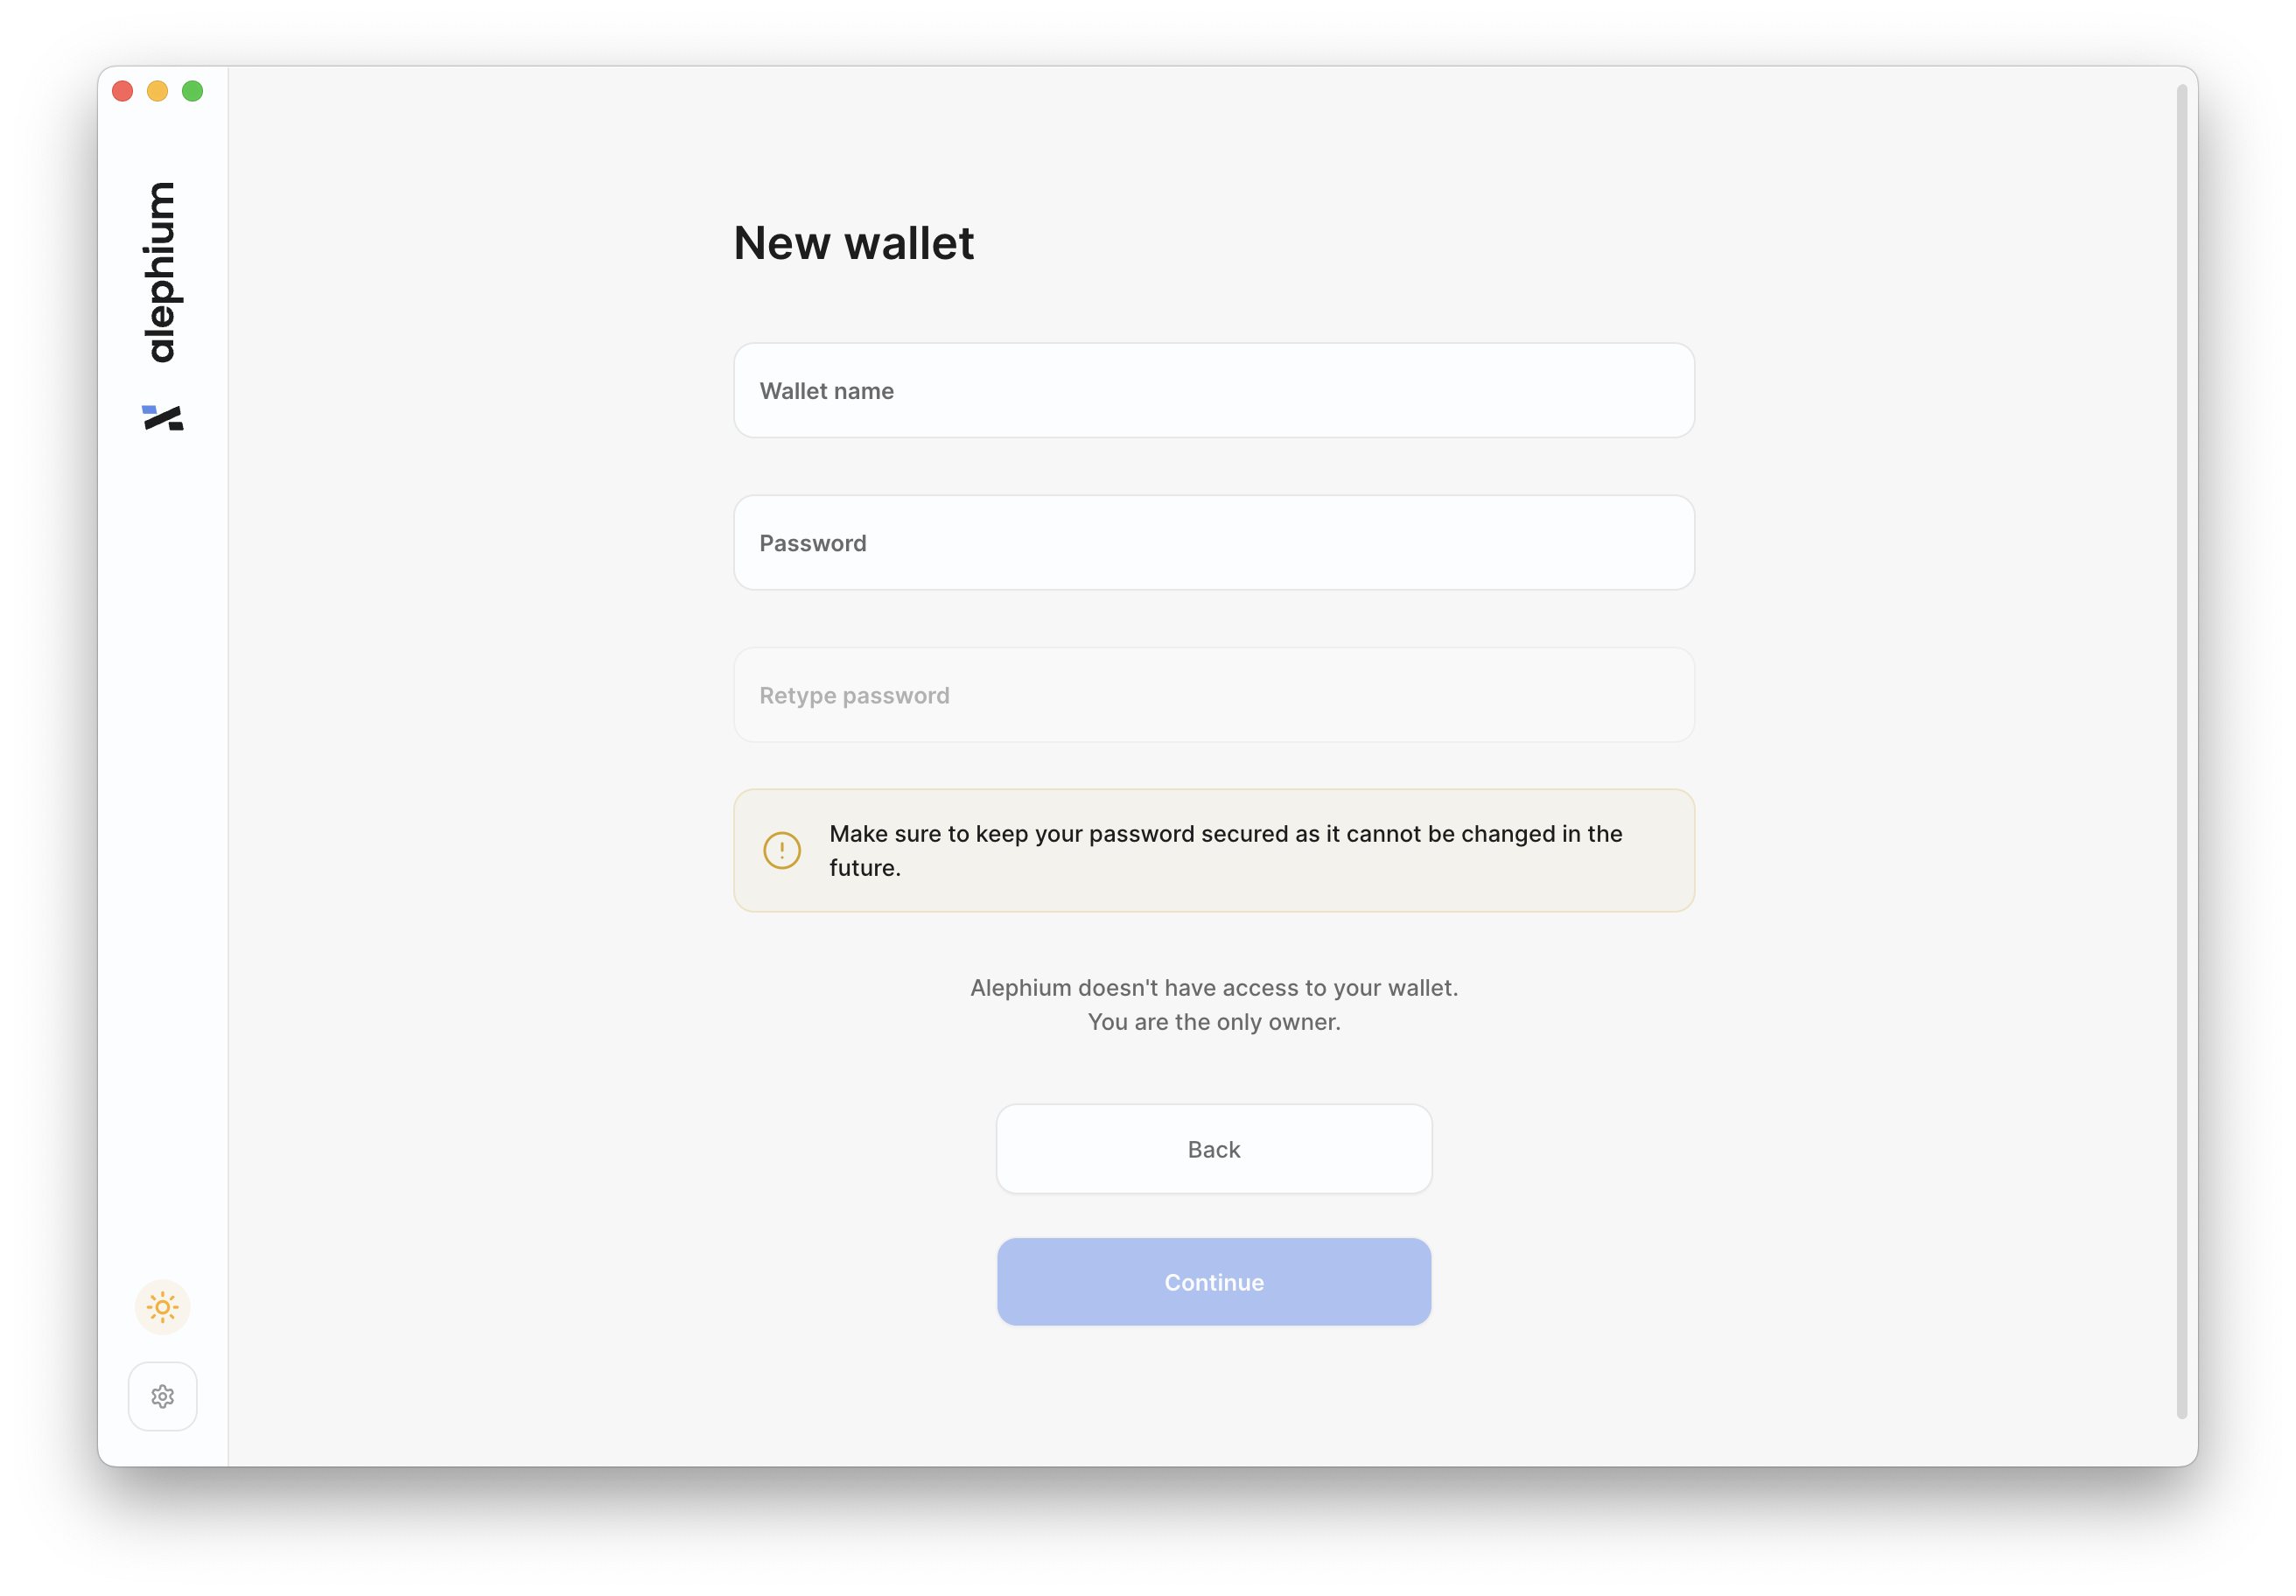
Choose a wallet name and pick a password to protect your wallet on your computer. This password does not replace your wallet's 24-word Secret Recovery Phrase. It is only used to lock and unlock the newly created wallet. Click
Continue.
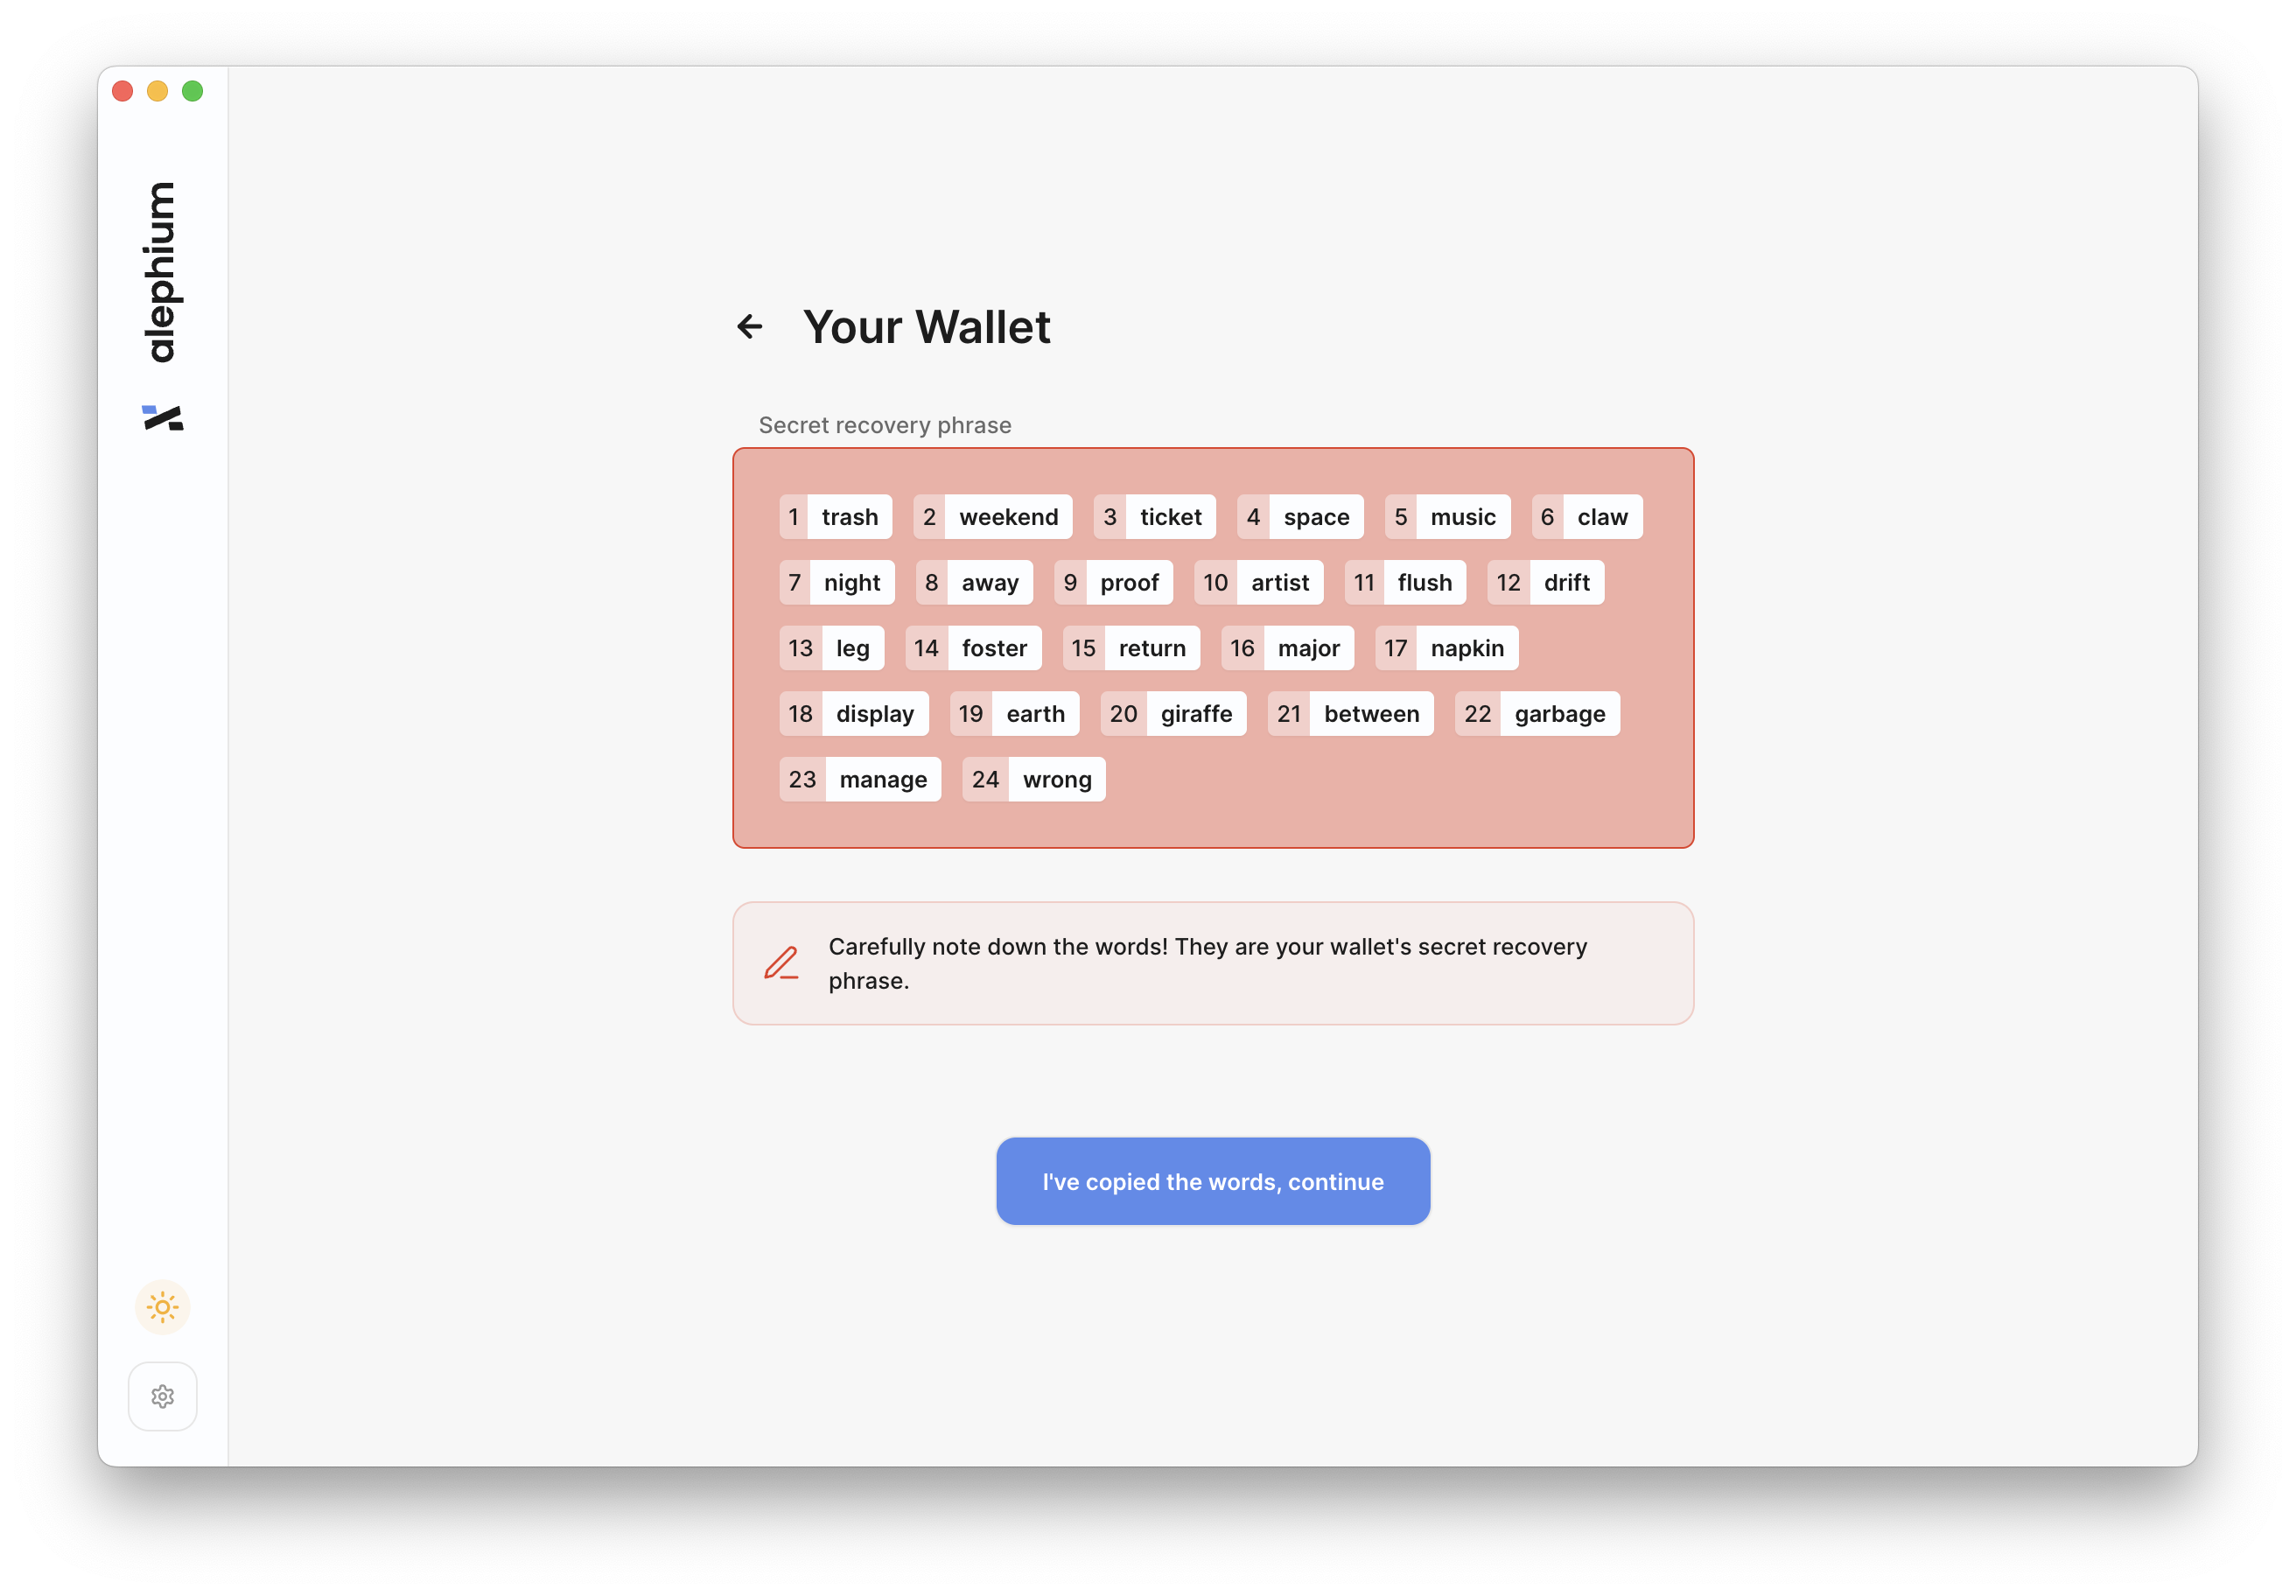

-
In the highlighted box, you will see 24 words. These are your wallet's 24-word Secret Recovery Phrase. This is your most precious piece of information, and you must store it wisely, safely, and carefully.
-
You will now be asked to verify that you got the 24-word Secret Recovery Phrase right. Click
Readyand select the words in the right order. If the process was done correctly, the words turn green. If a mistake was made, they turn red: don't worry, you can reorder the words until you get the Phrase right. -
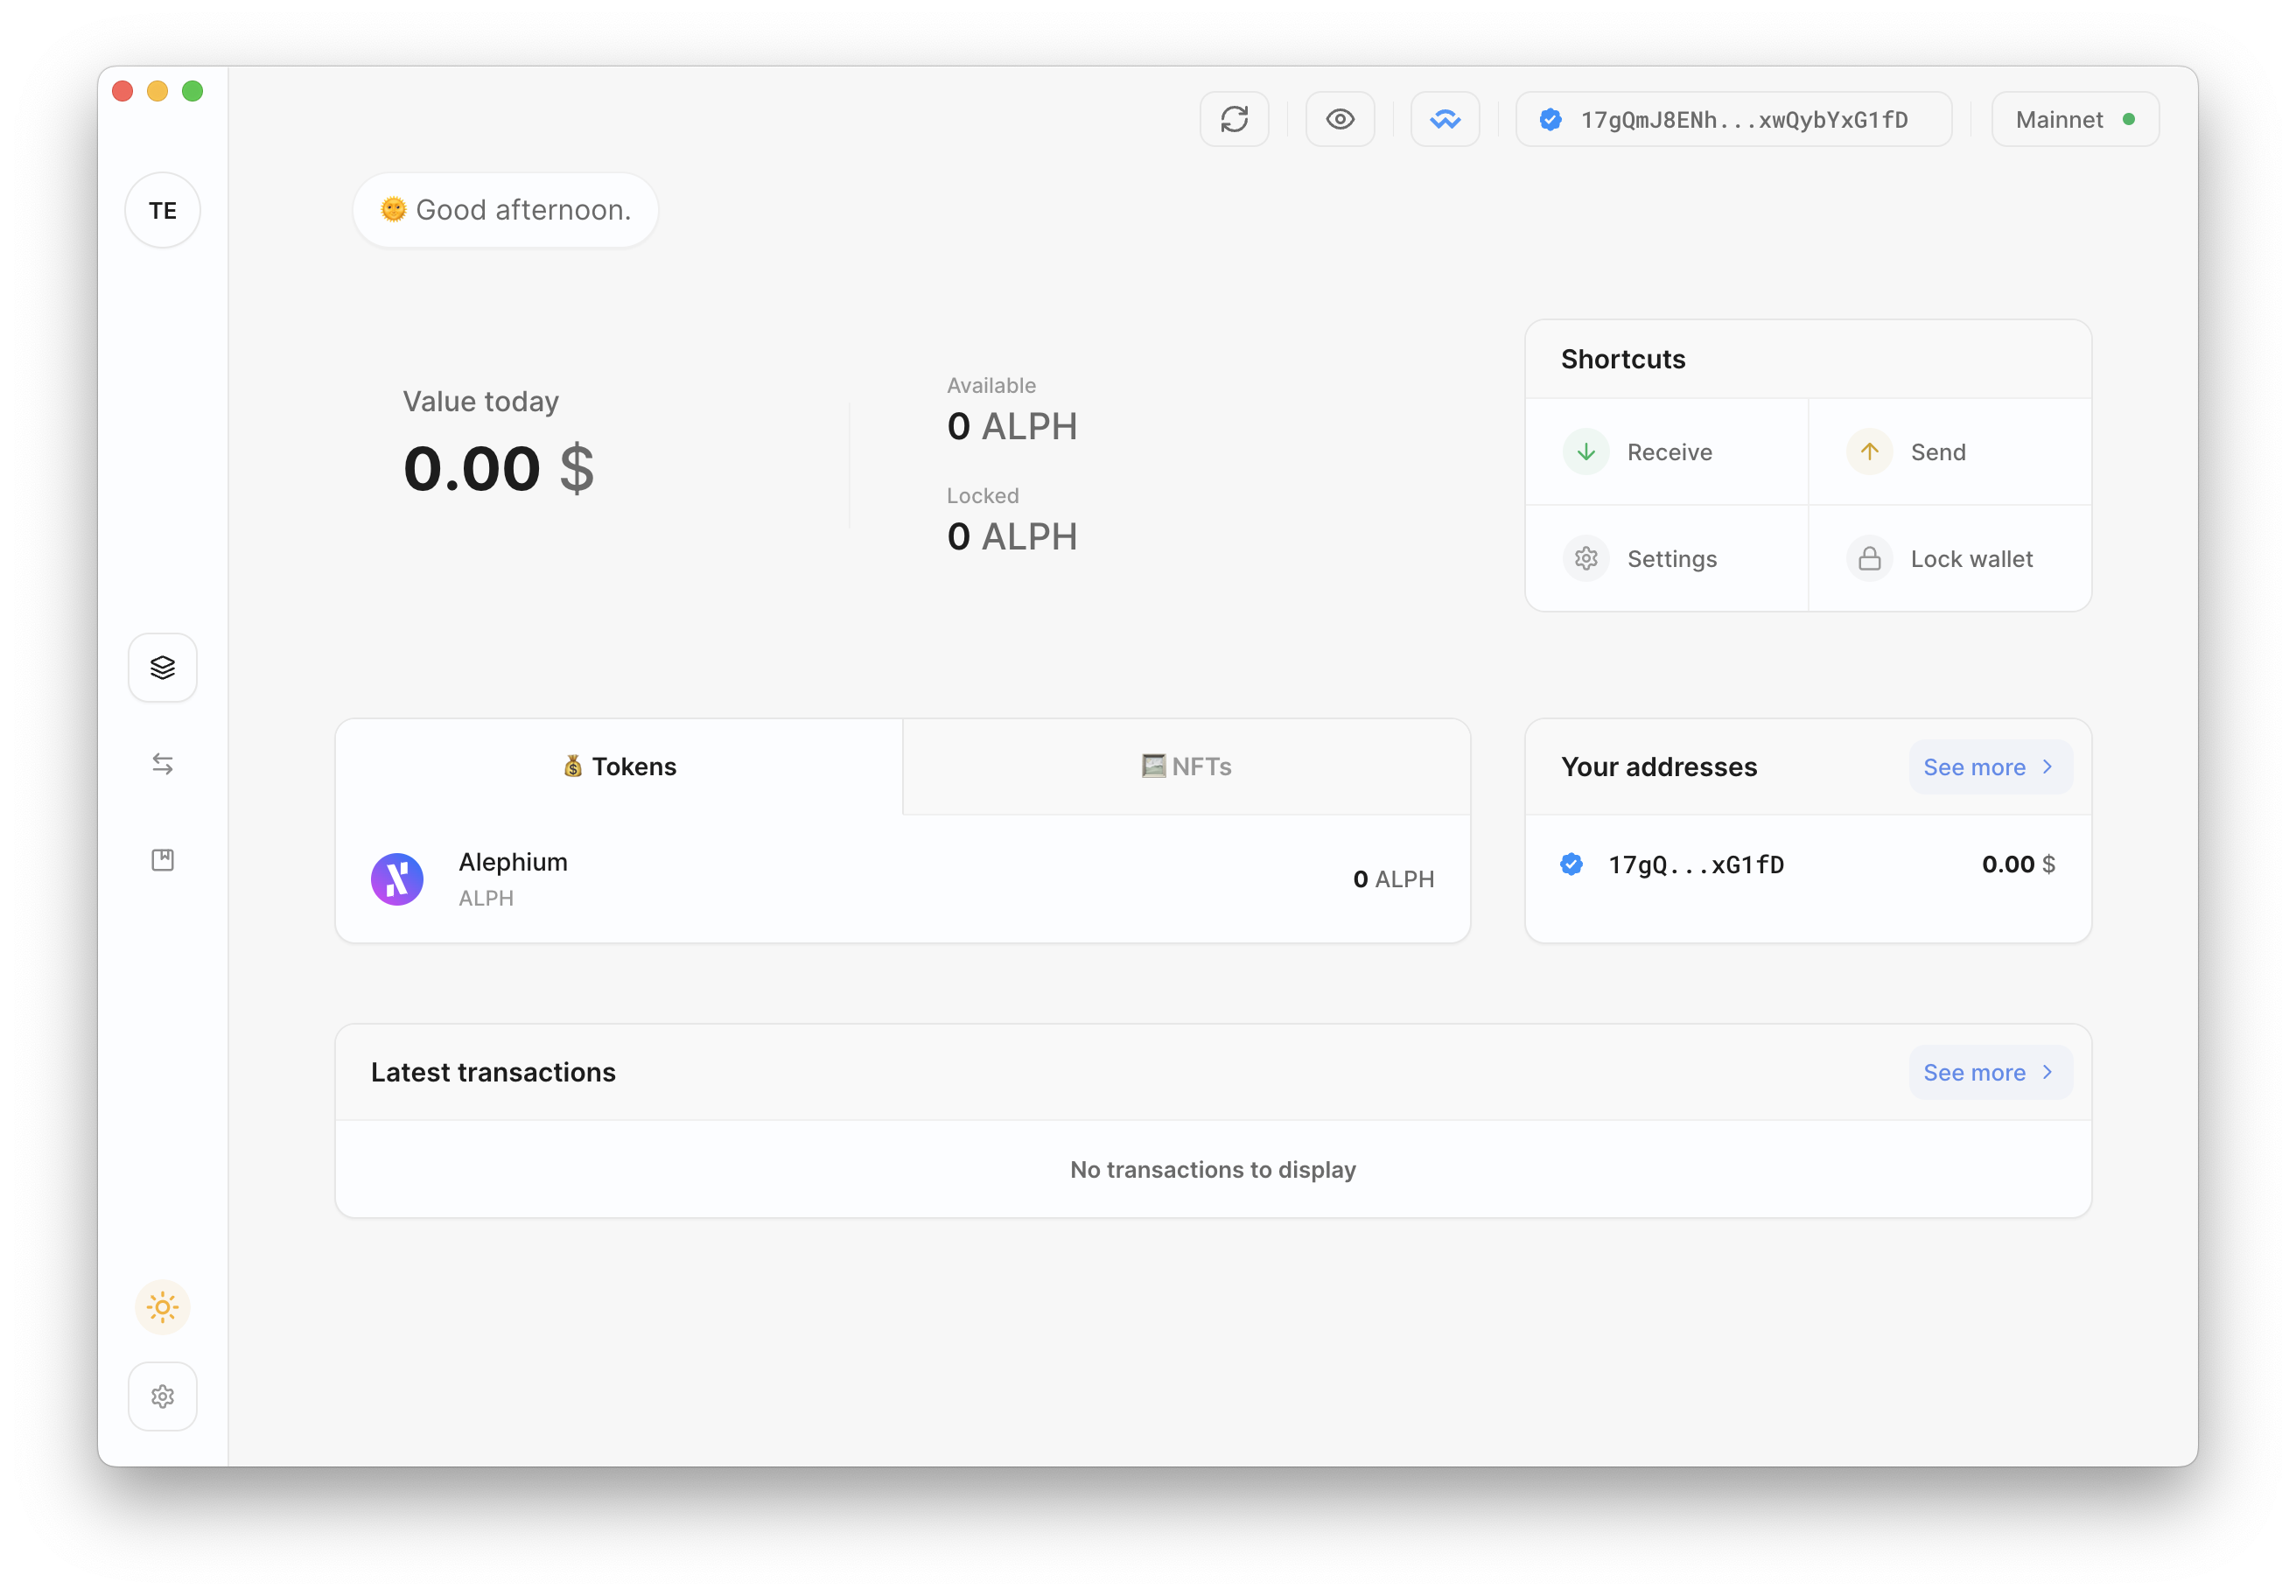
Everything is now ready! Welcome to your new wallet.
3. Transfer ALPH
-
To send ALPH, simply click on the
Sendbutton. -
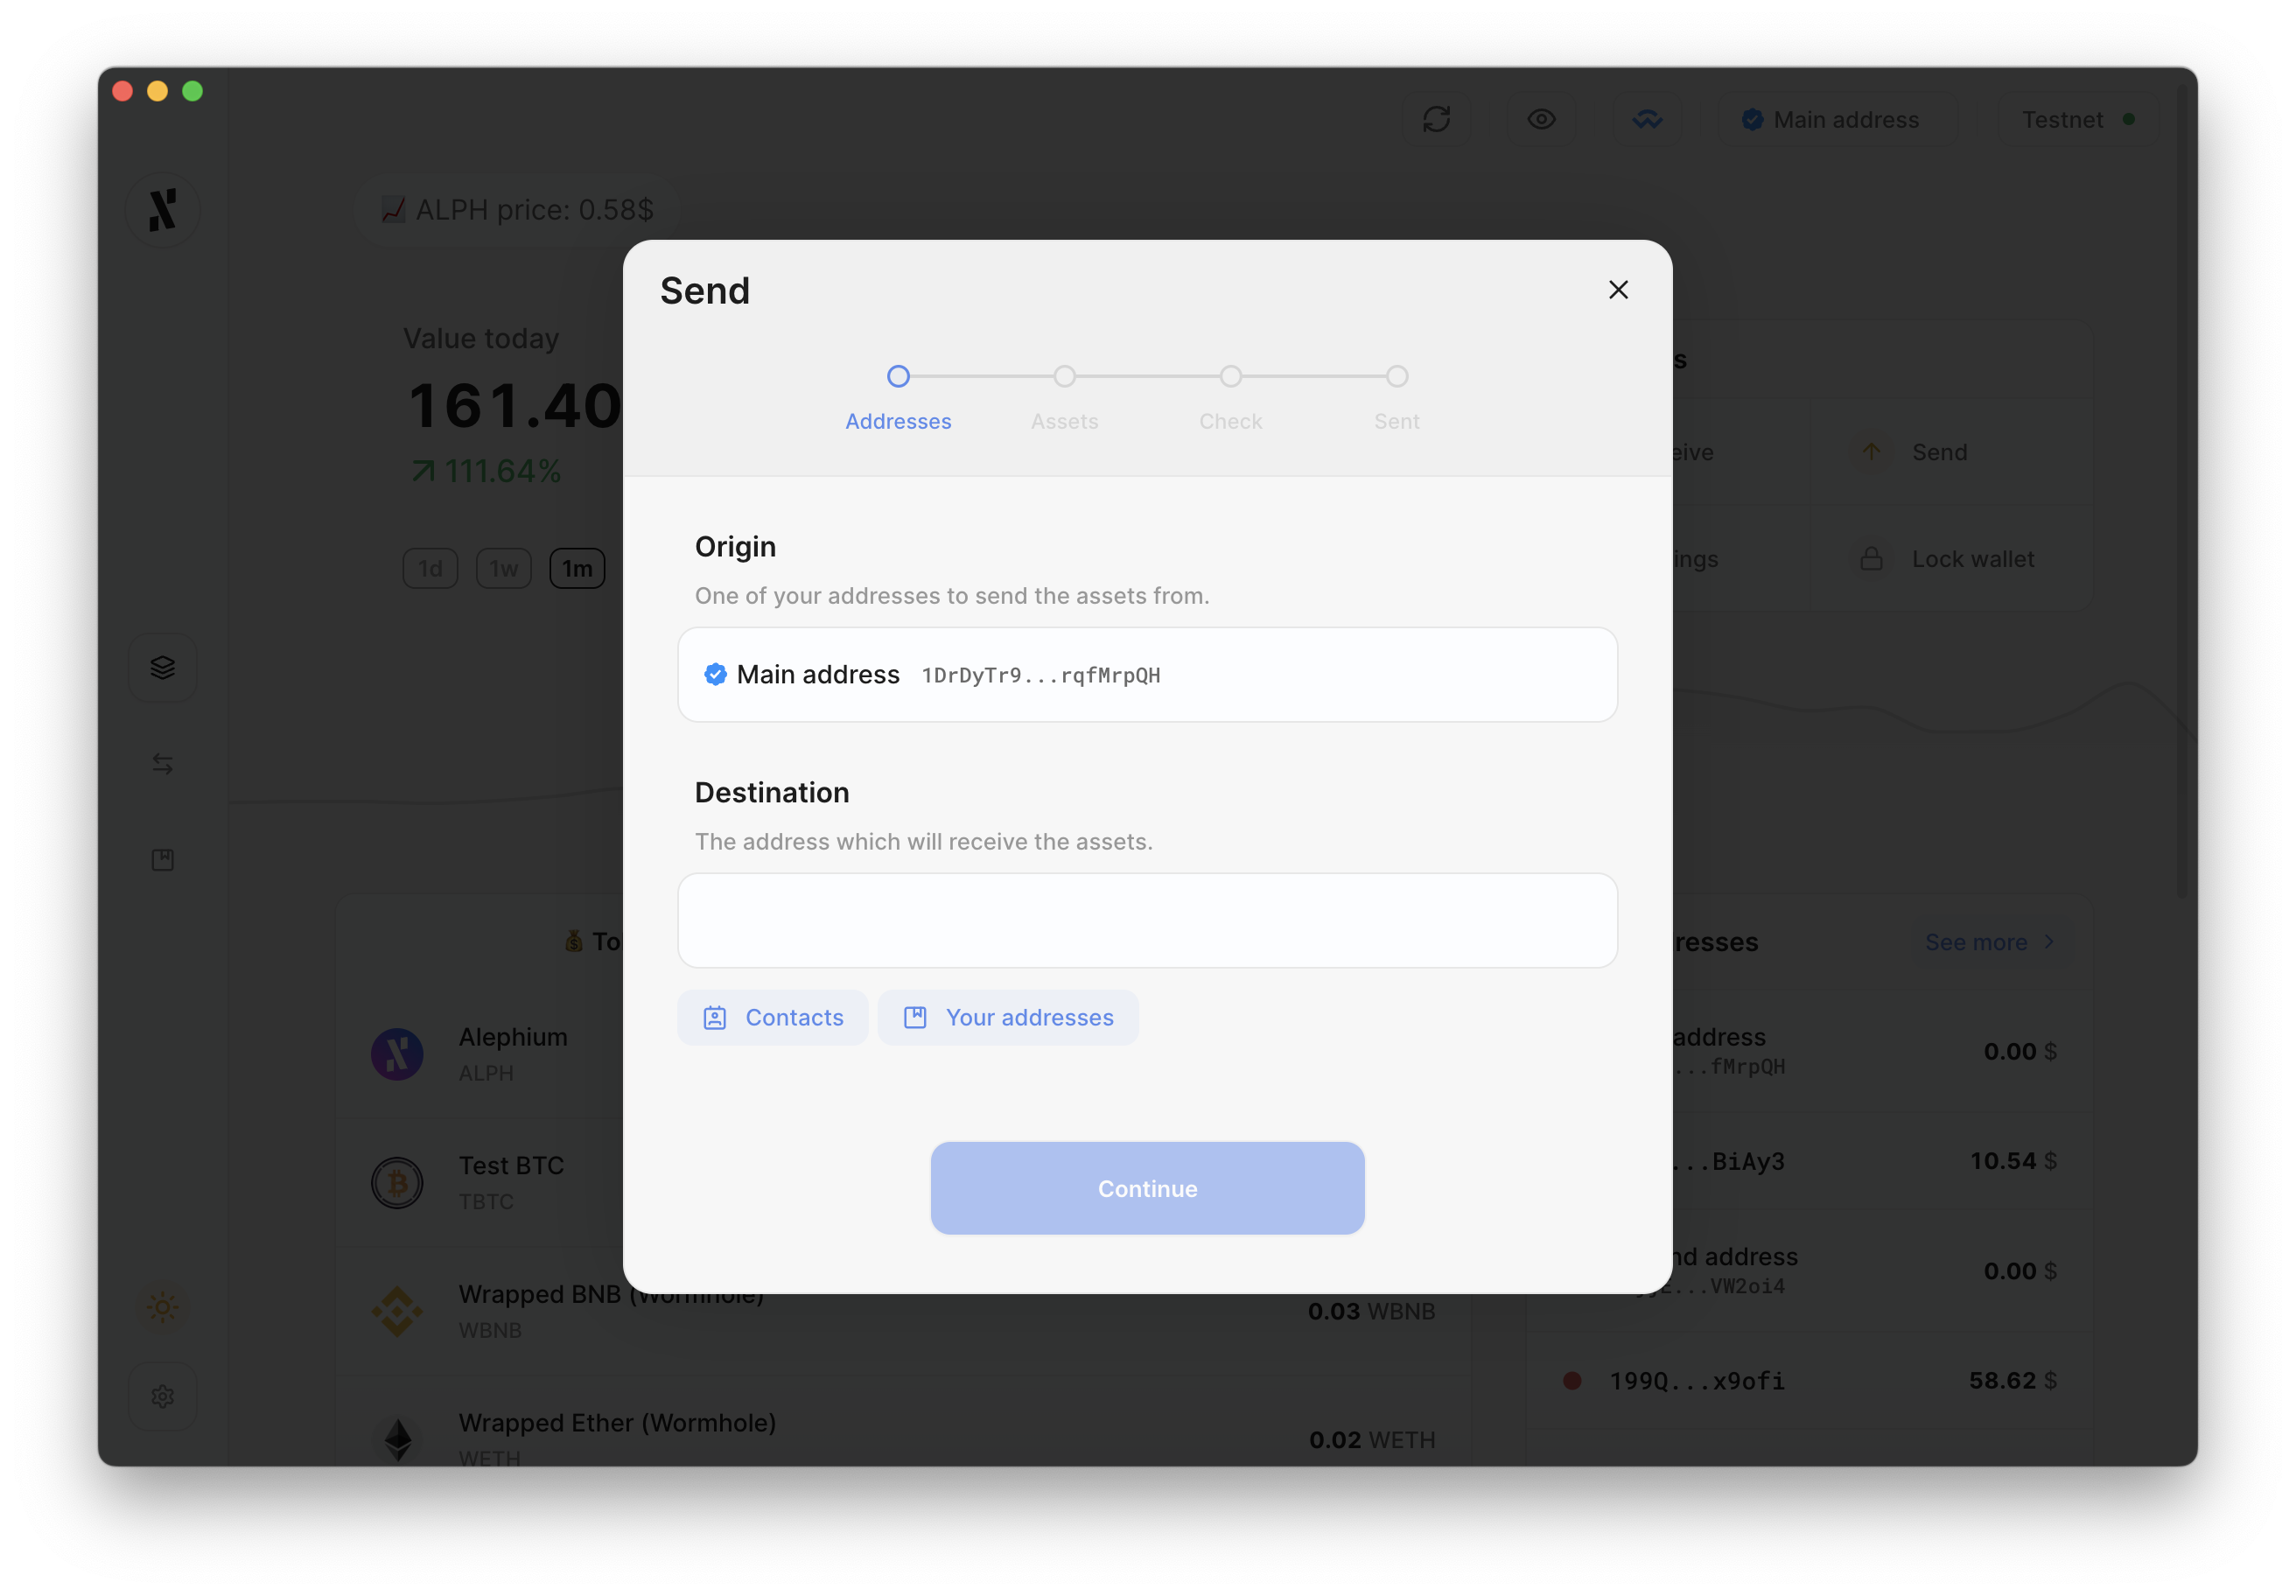
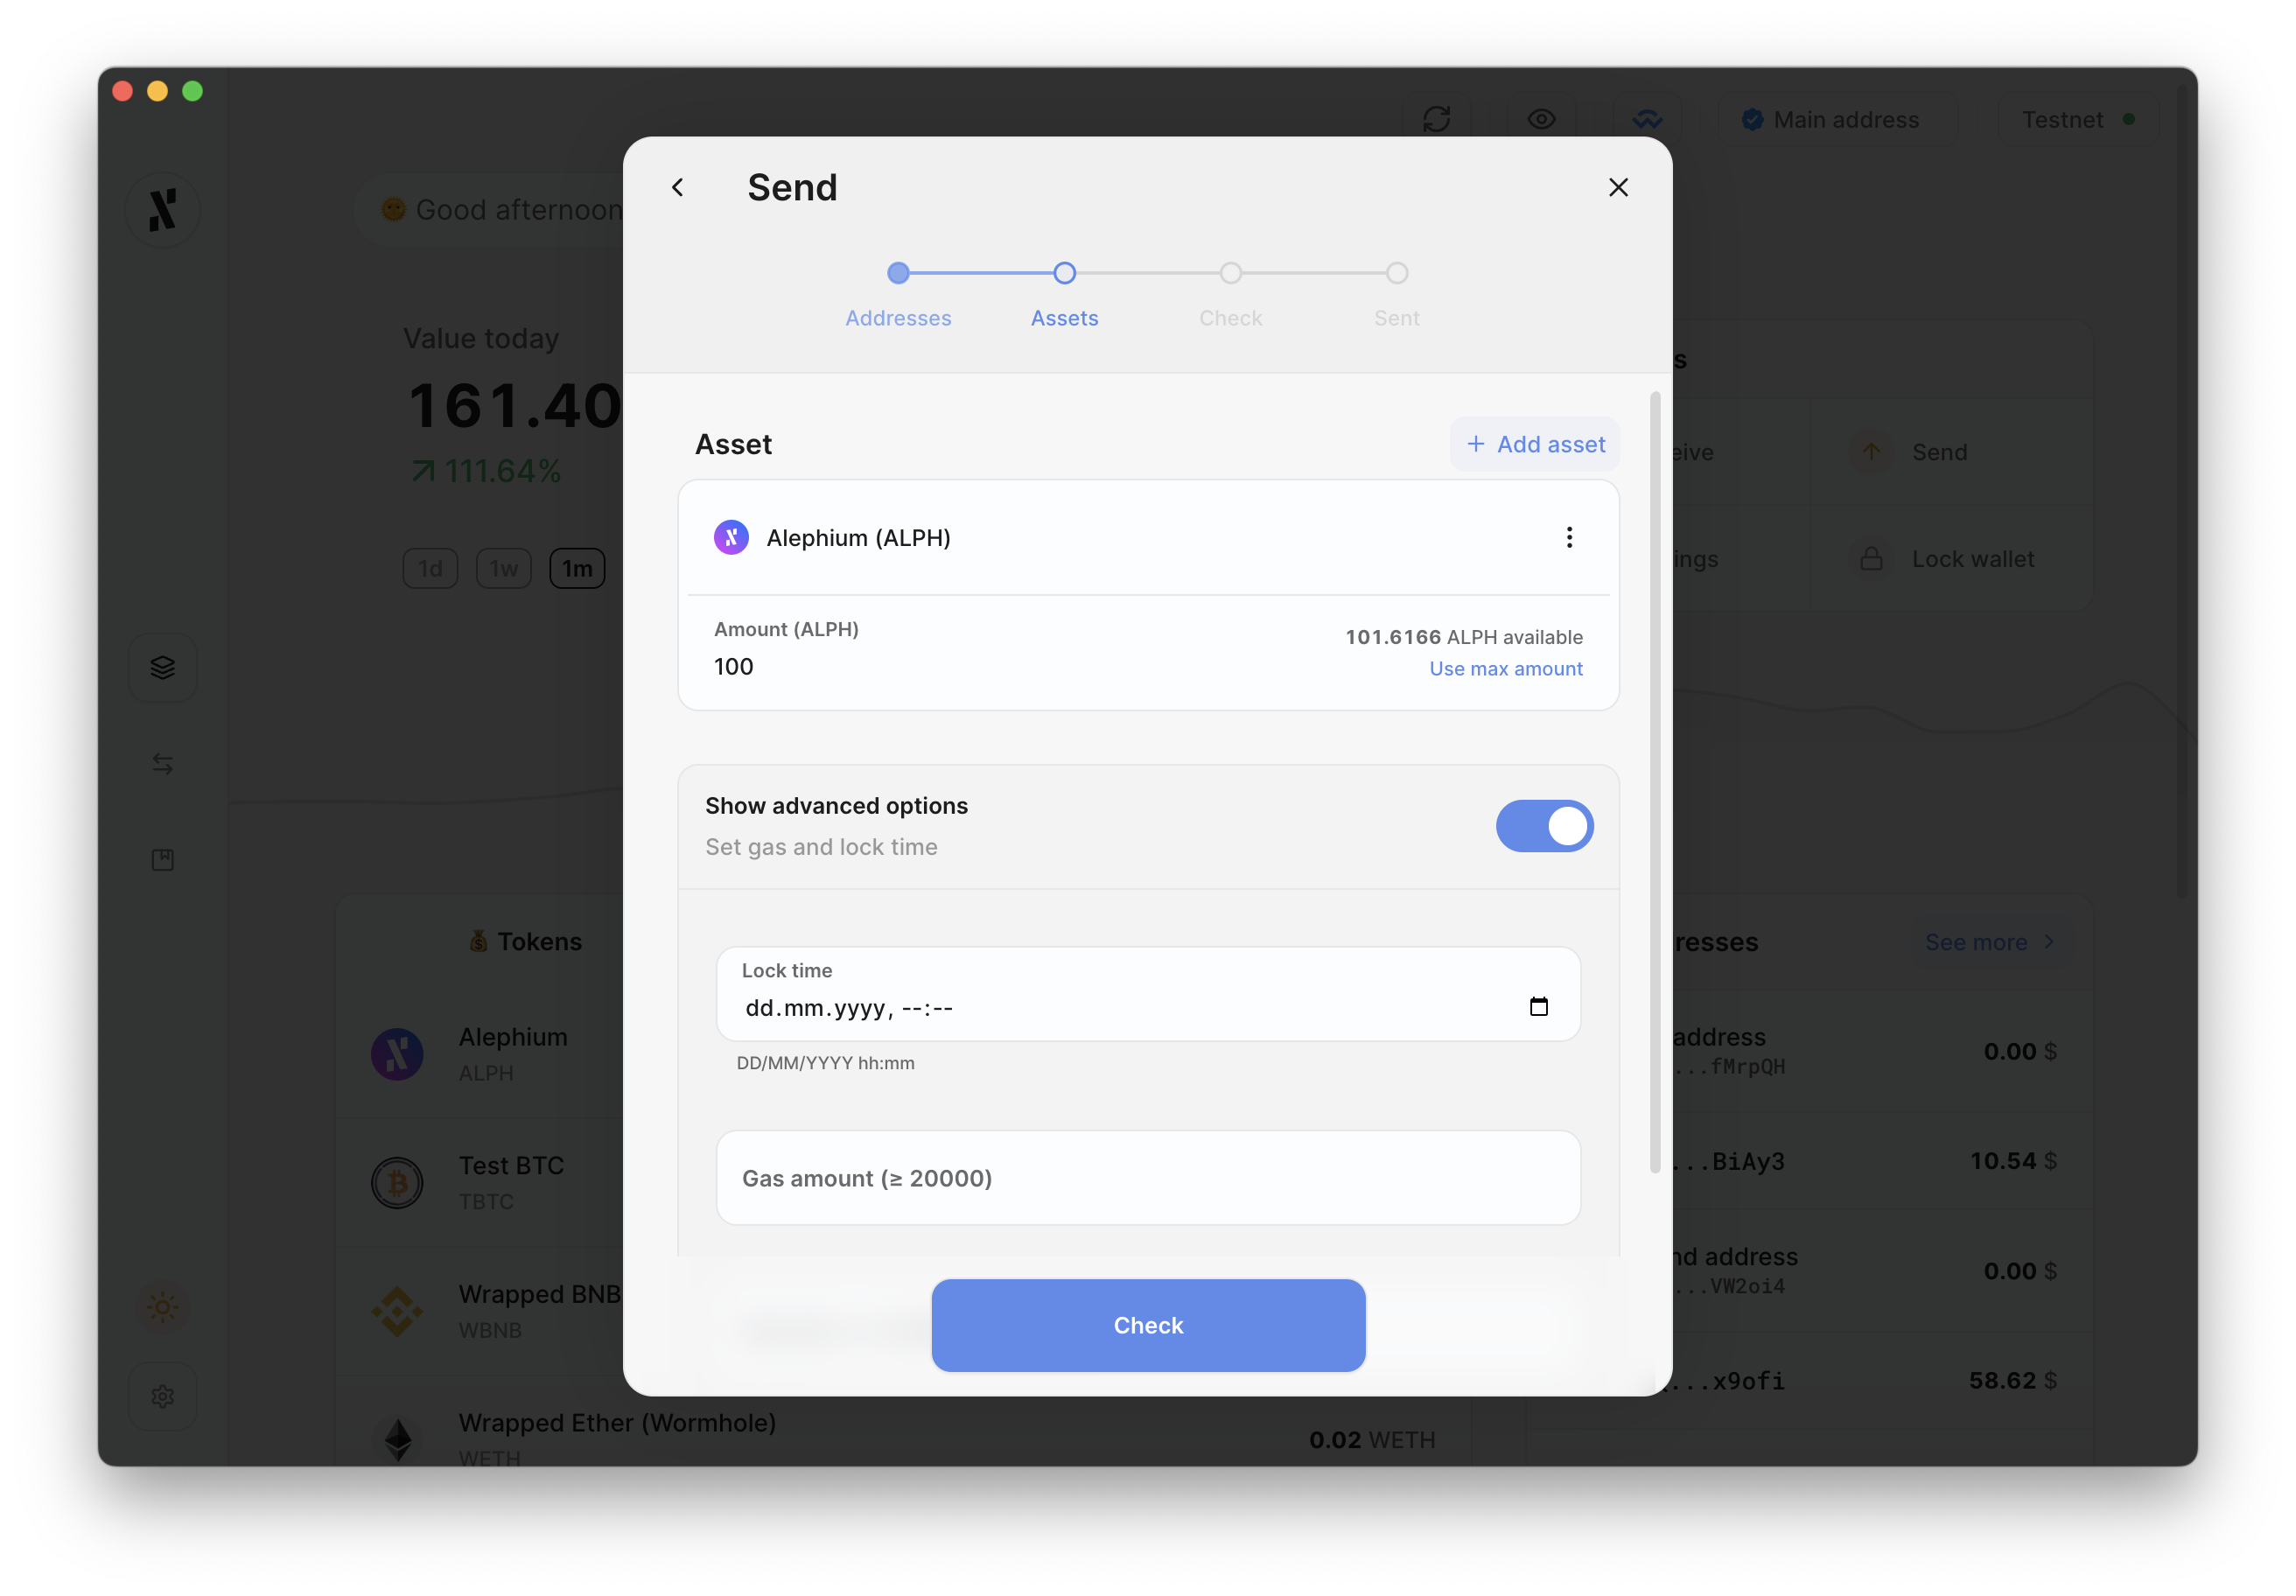
Enter the amount of ALPH (e.g. 100) and recipient's address.
-
(Optional) You can set a lock time by ticking the corresponding box. In that case, the ALPH will be sent to the recipient address but subject to an on-chain lock until the date you have indicated. Please note that it is not possible to change the lock-time once the transaction has been submitted.
-
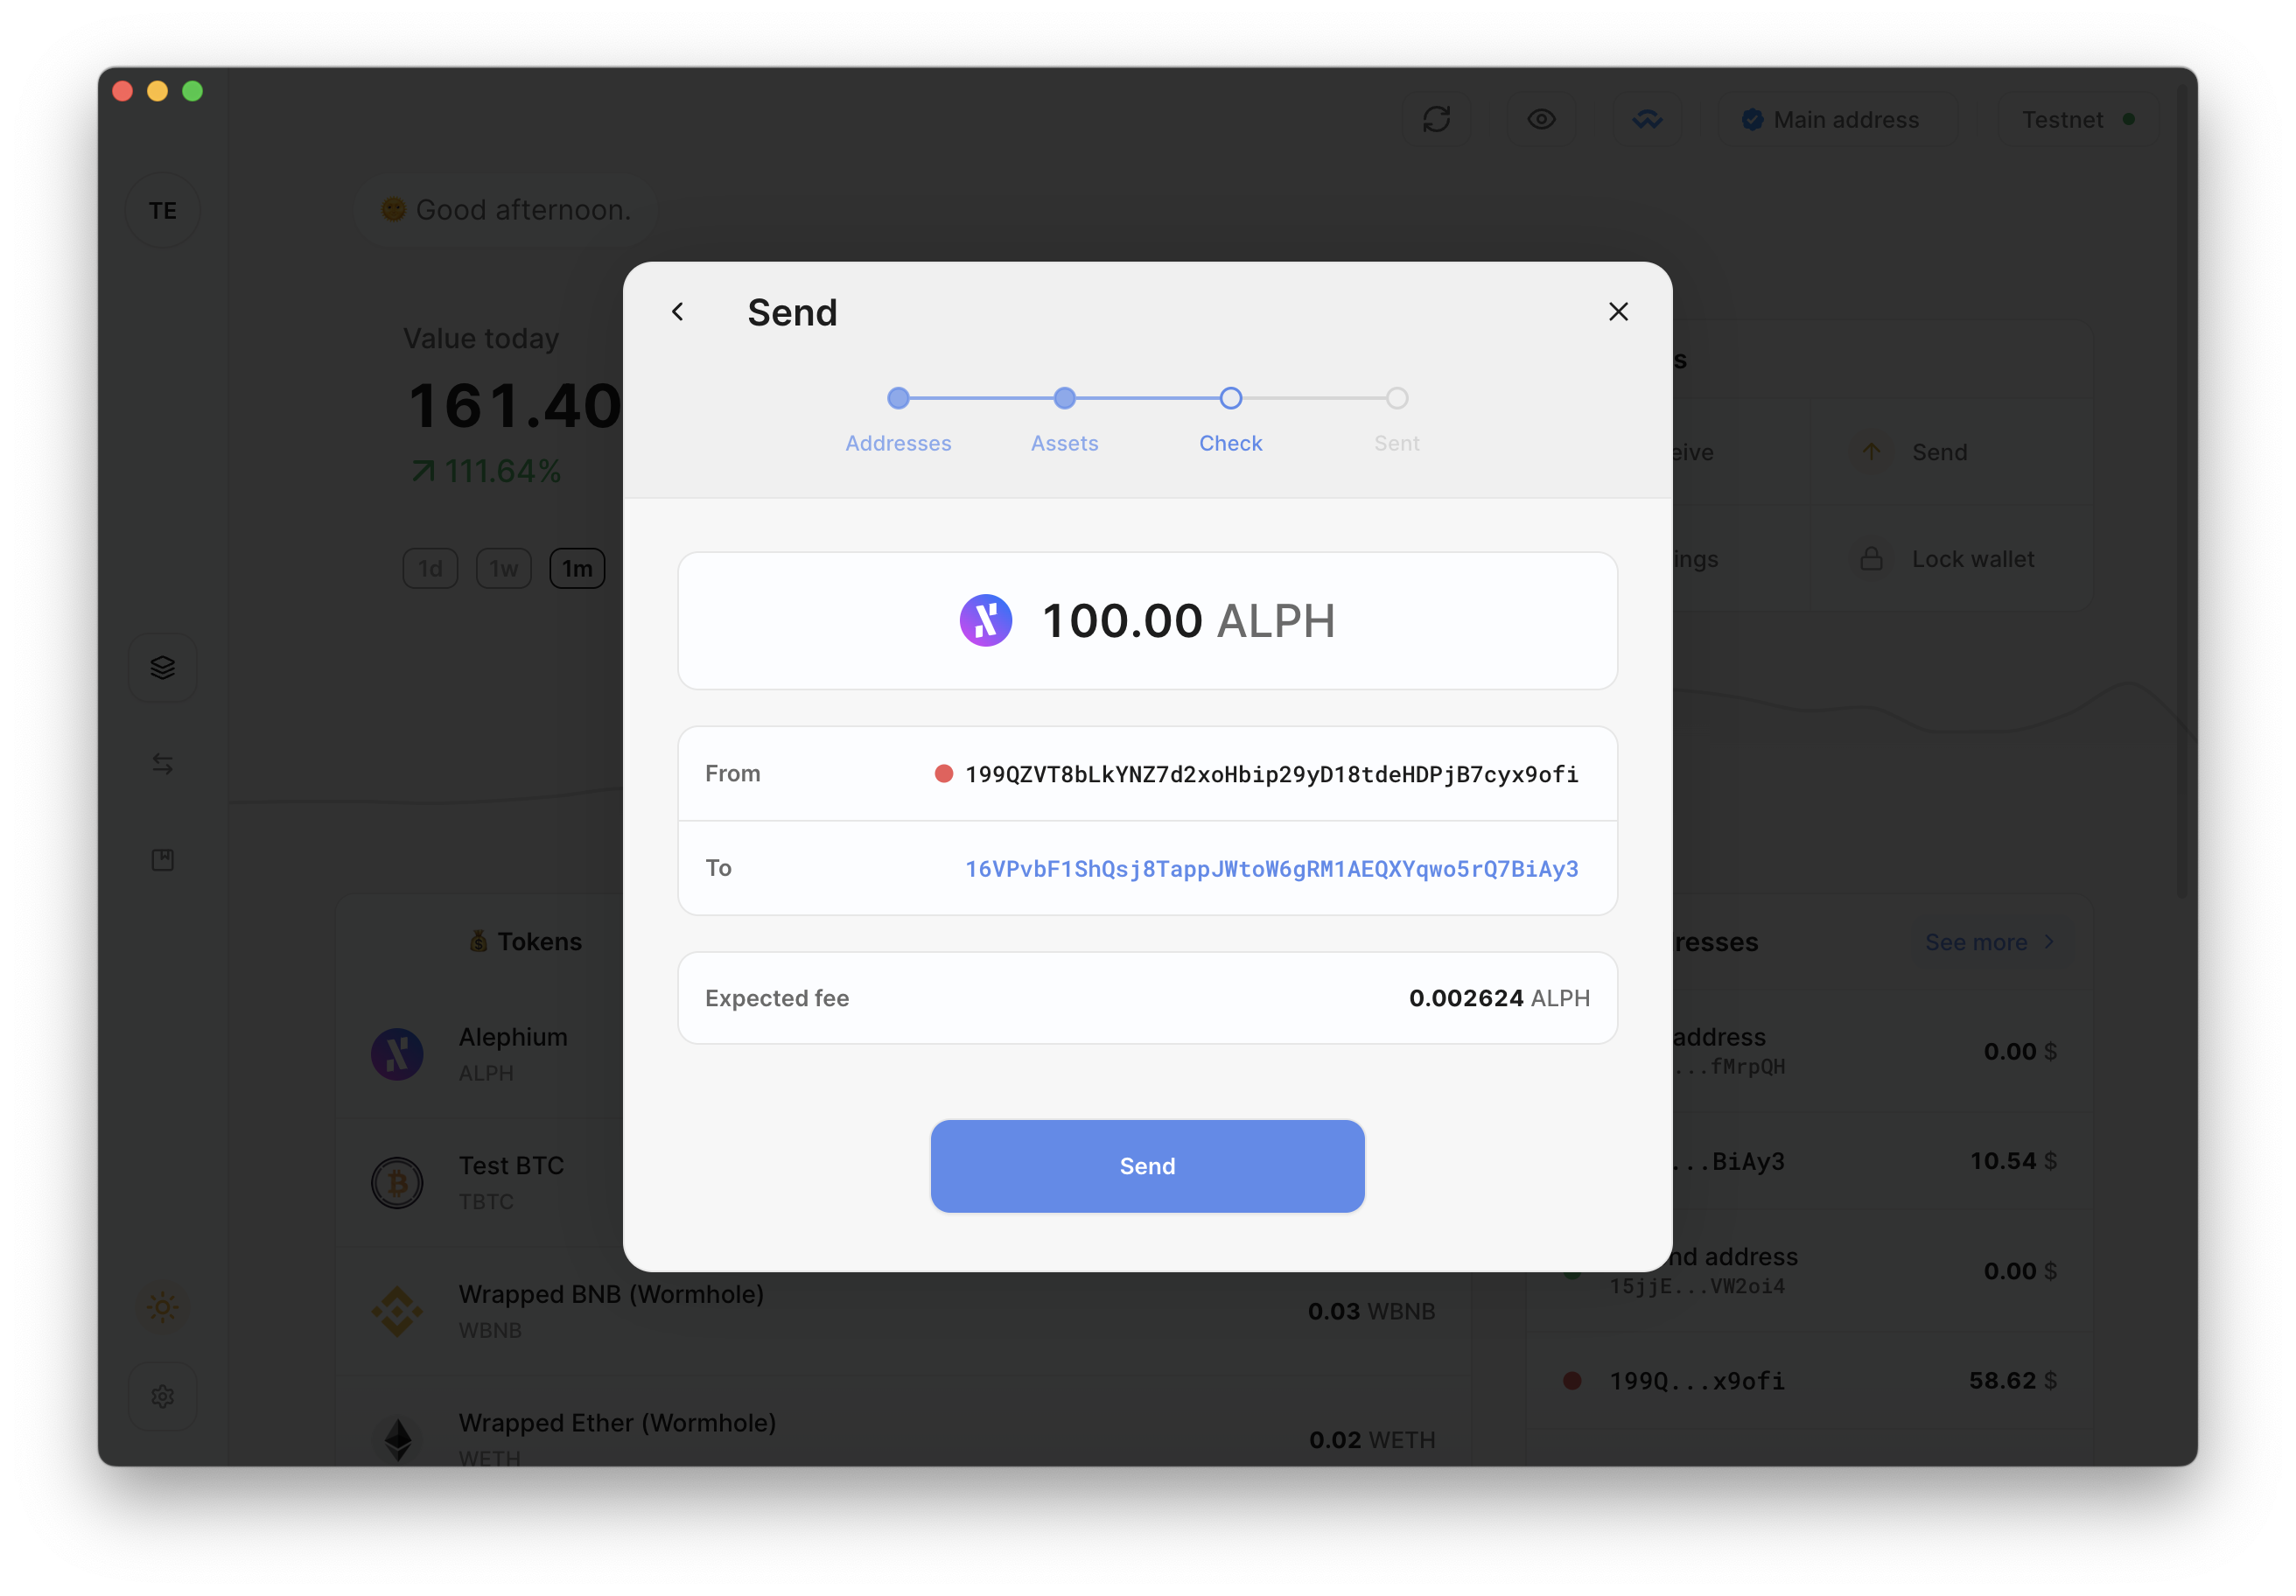
Click
Checkand carefully review your transaction details. Once you click onSendthe ALPH will be transferred to the recipient.
The transaction can be seen in both the Overview tab as well as the Addresses tab when clicking on the specific address.
4. Manage Addresses
You can see all the existing addresses displayed in a list in the Addresses tab, with information such as their label, respective balances, group number, etc.
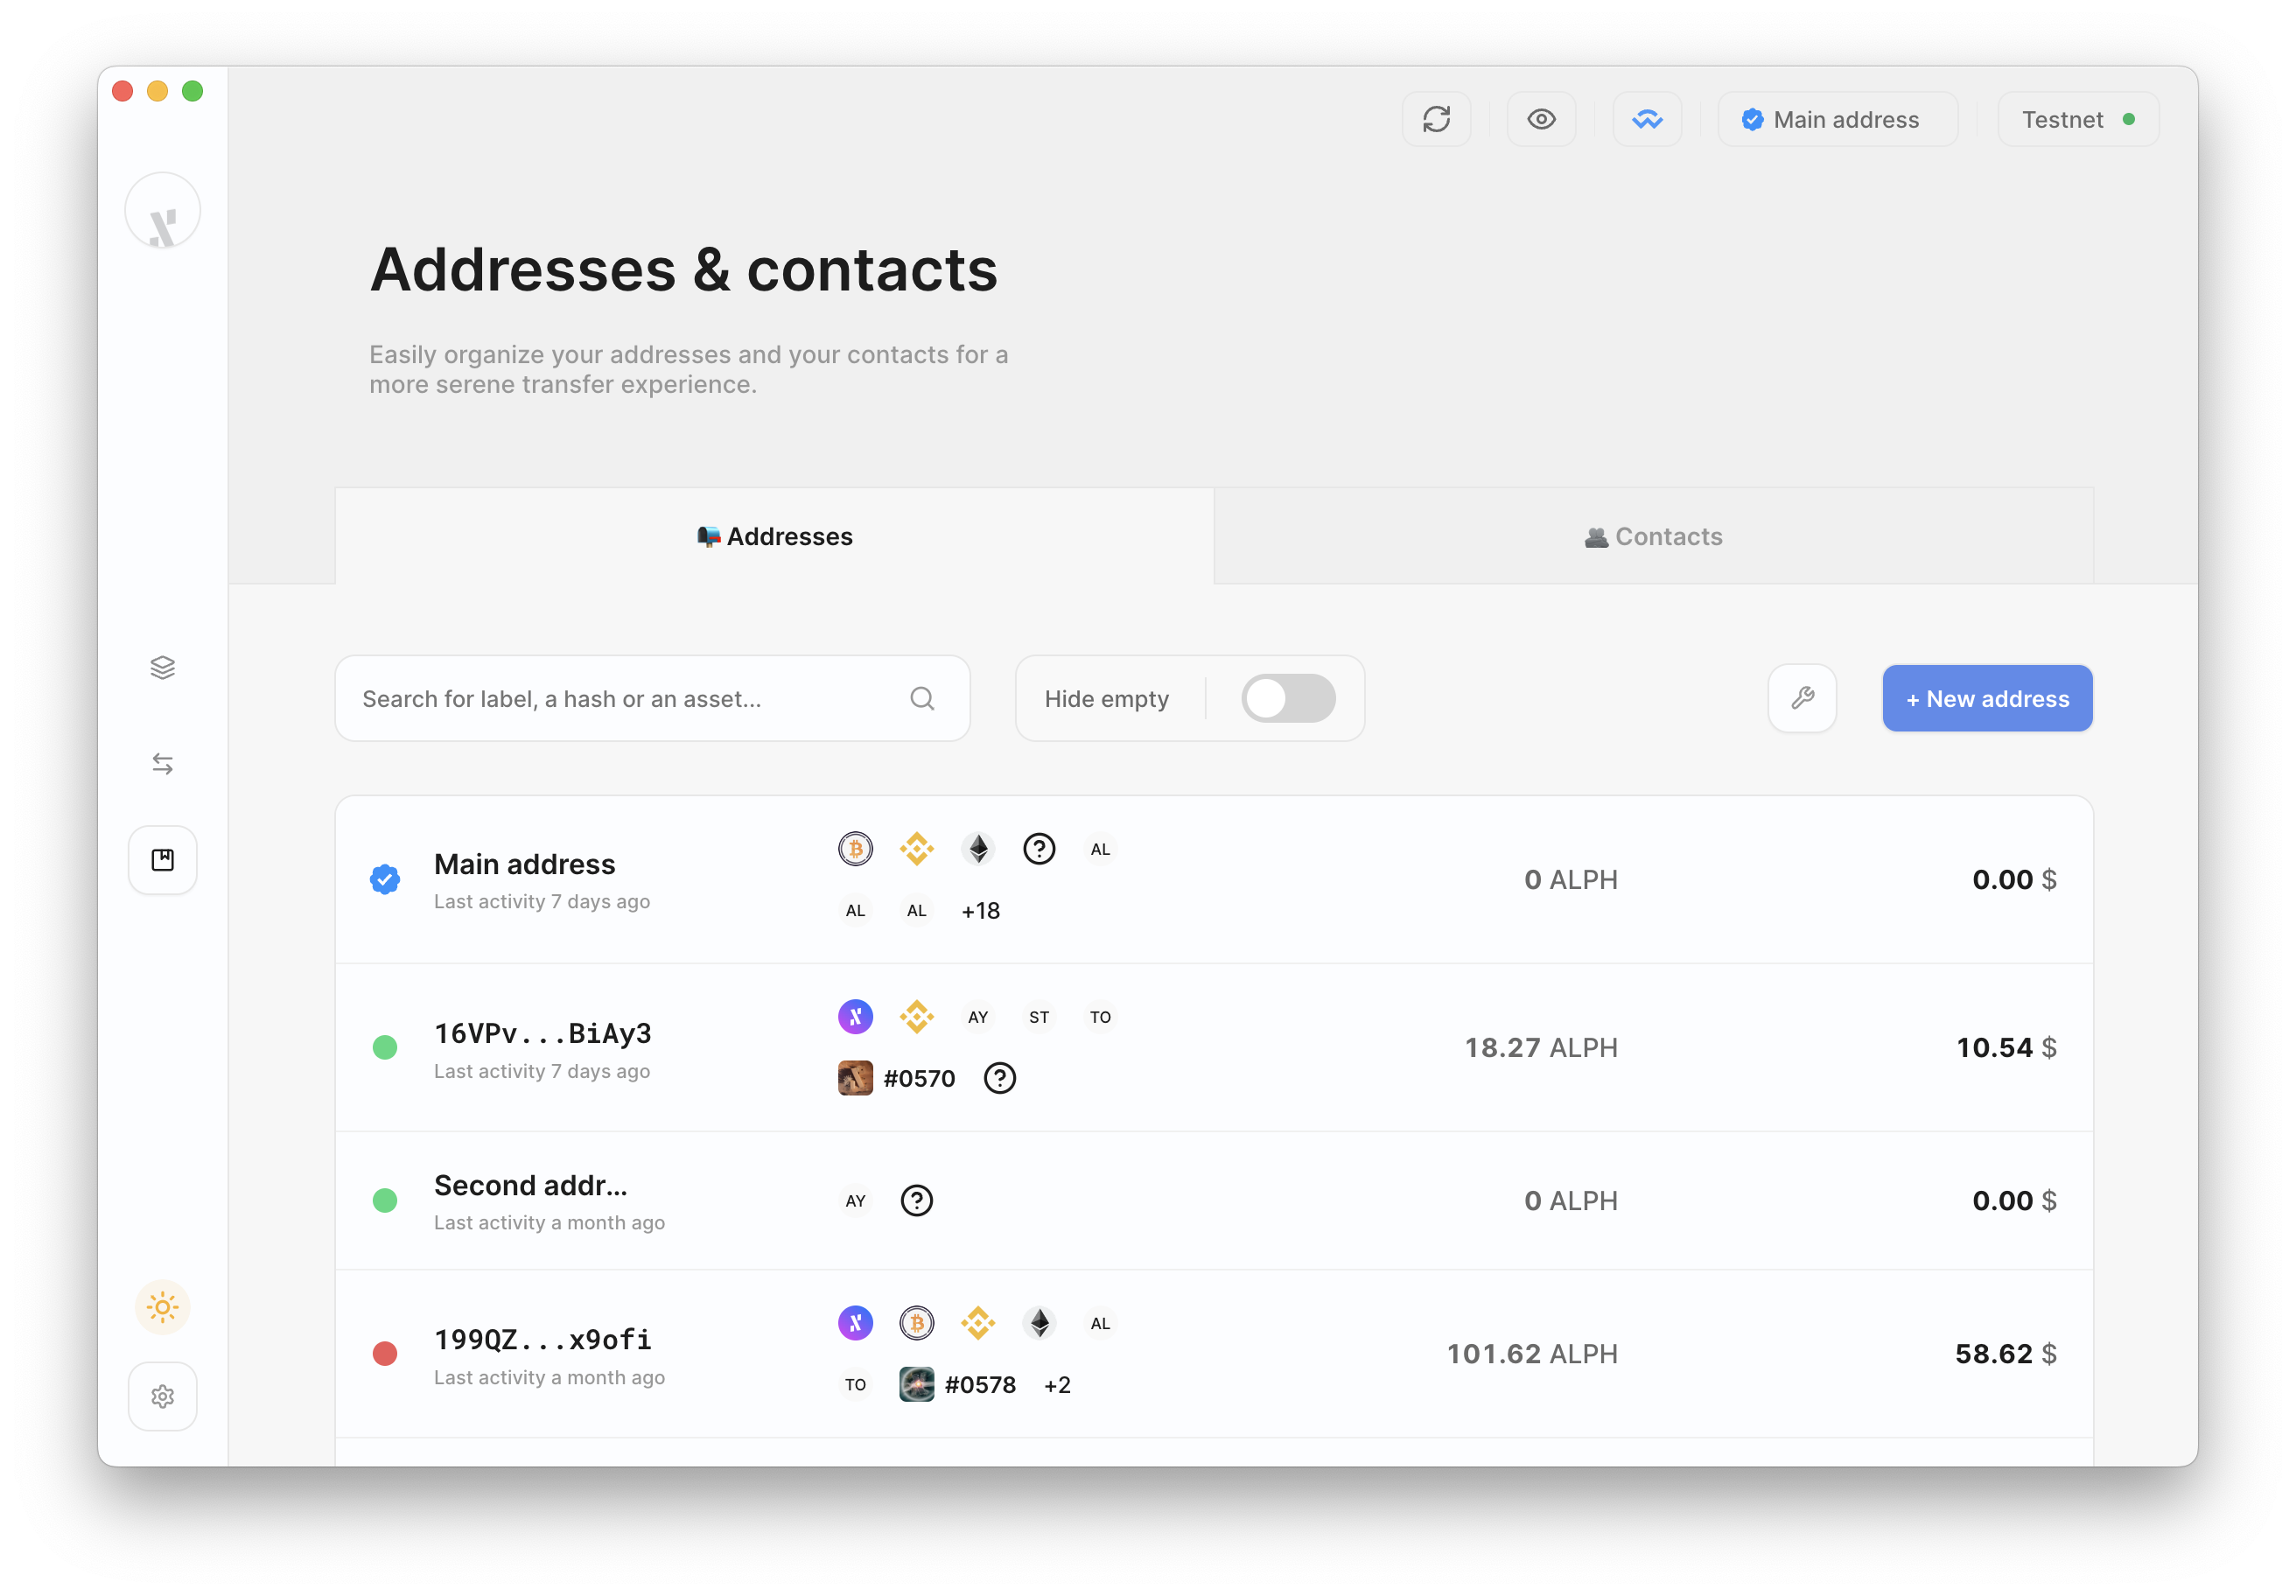
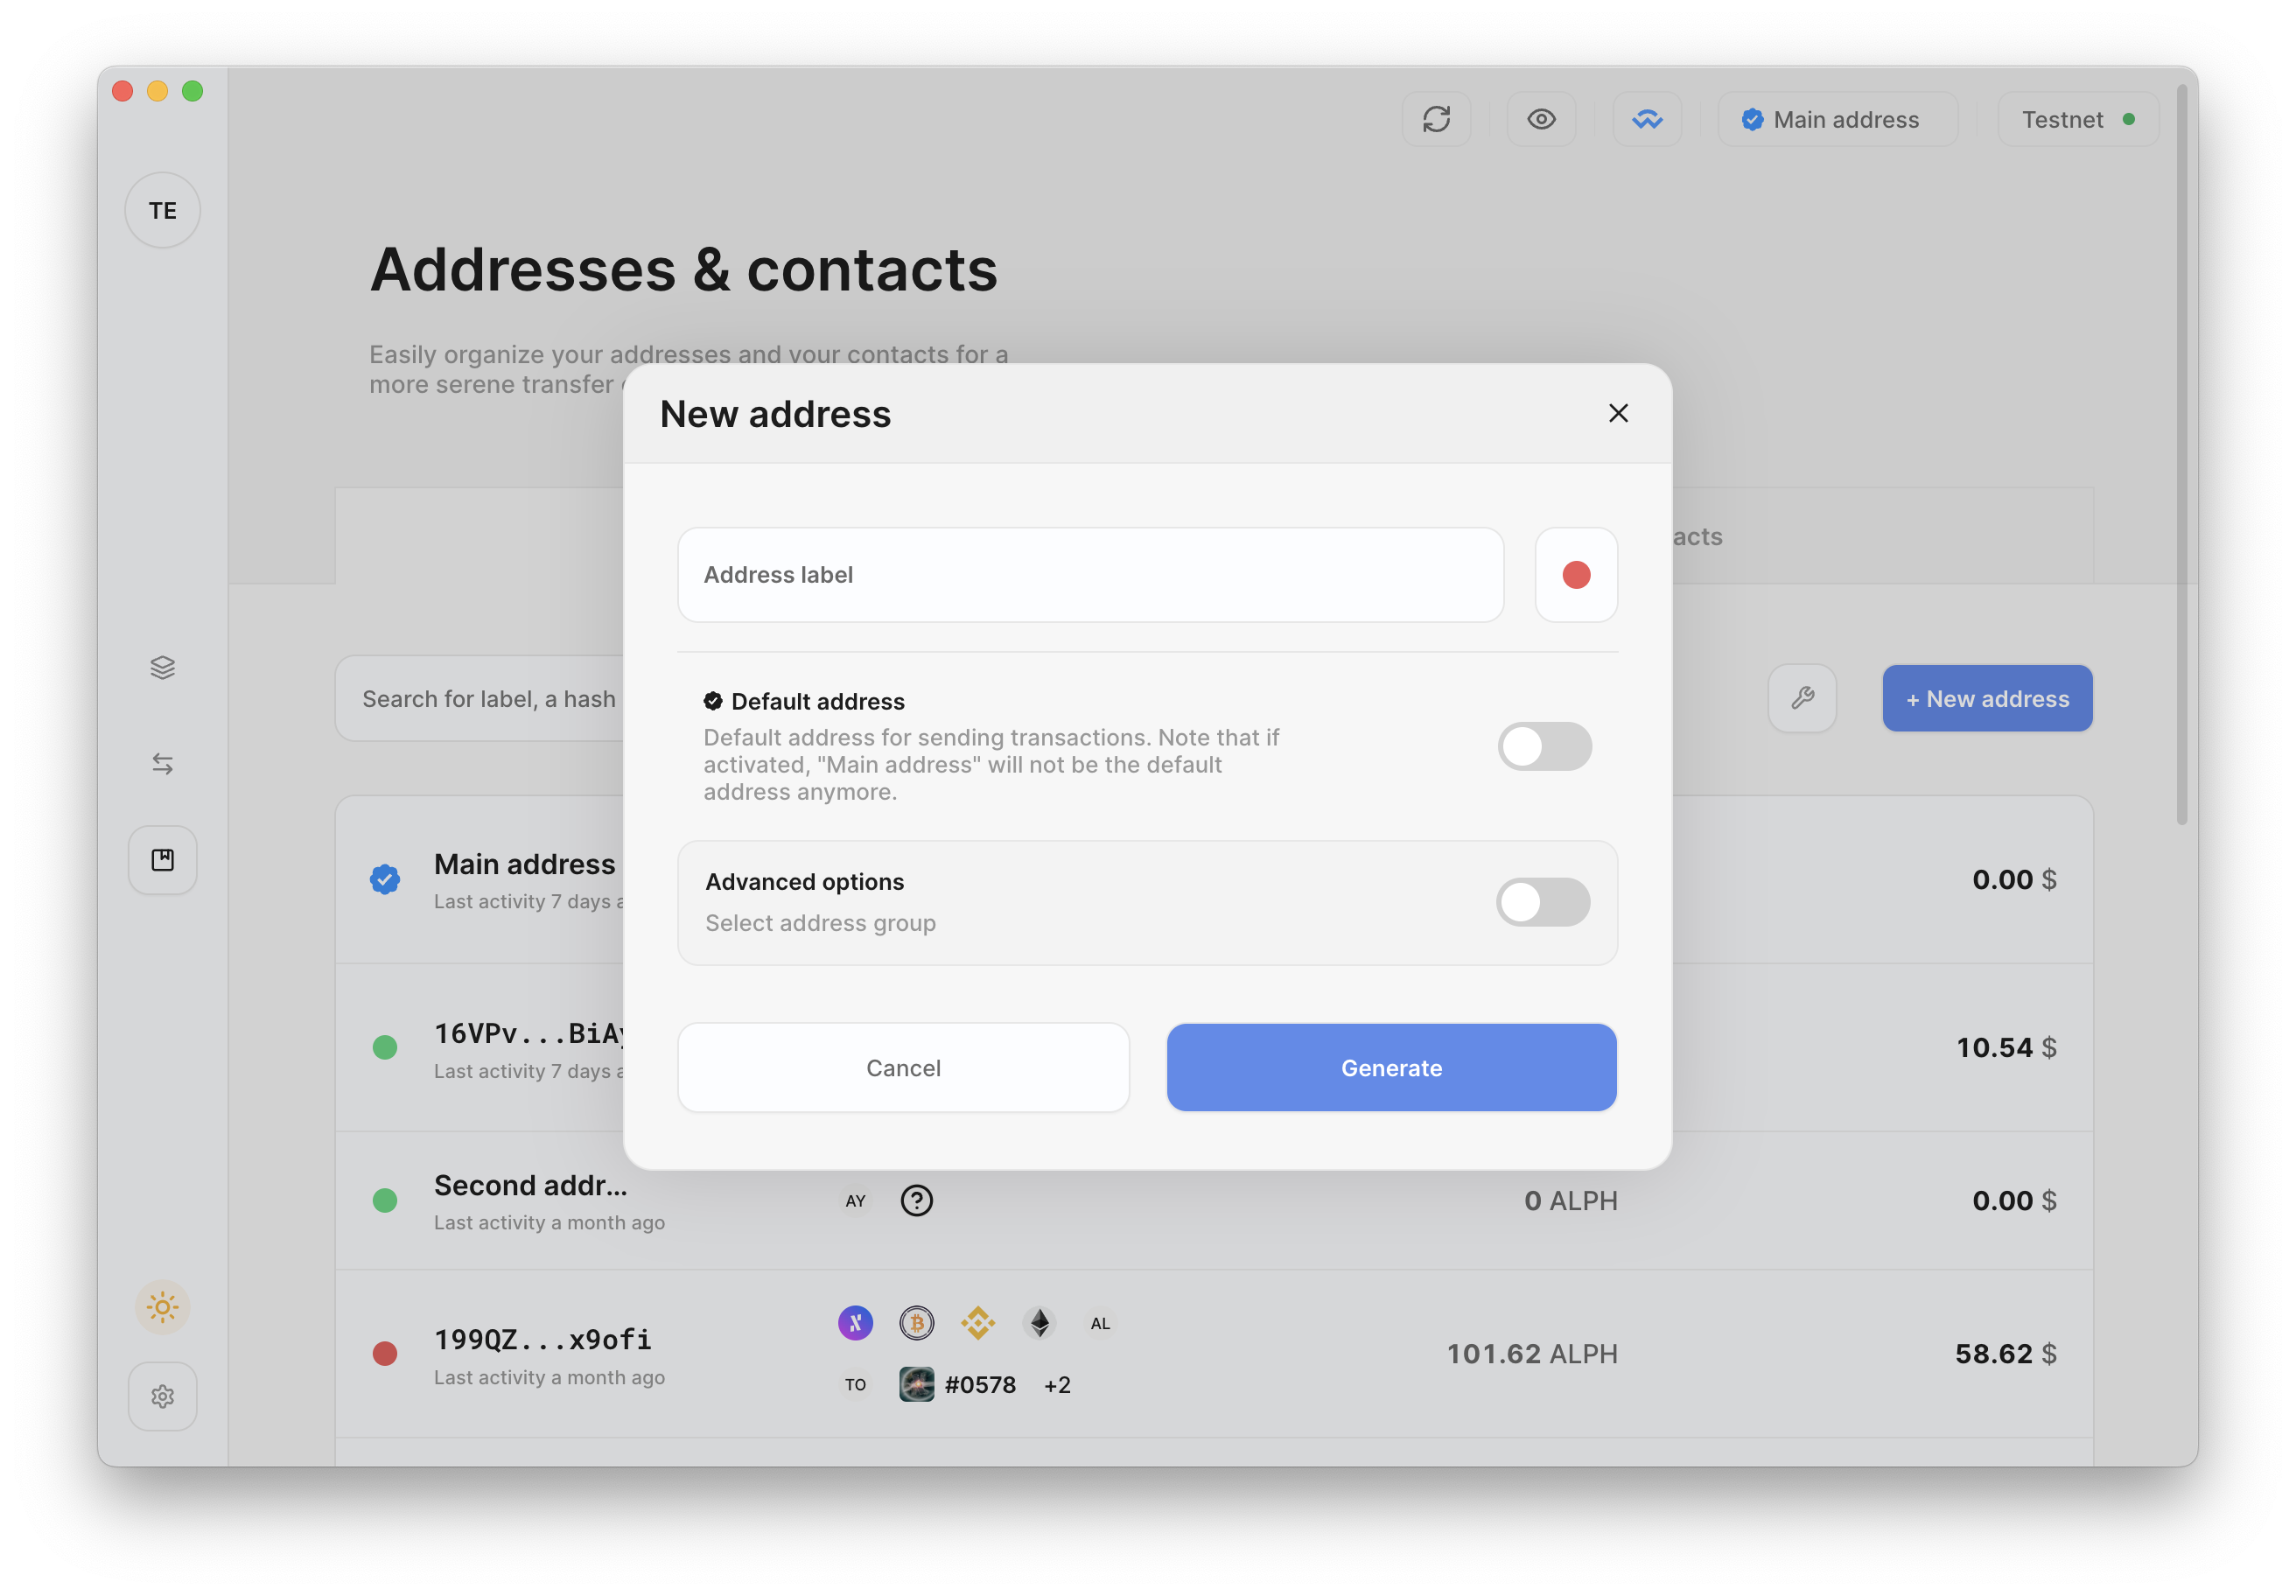
Clicking on one of the + New address buttons brings you to the New address page where you'll be able to create and label the new address. By default, addresses are generated in a random group. You can manually choose a specific group under the Advanced options section.
By clicking on a specific address, you'll see the address details including its transaction history.
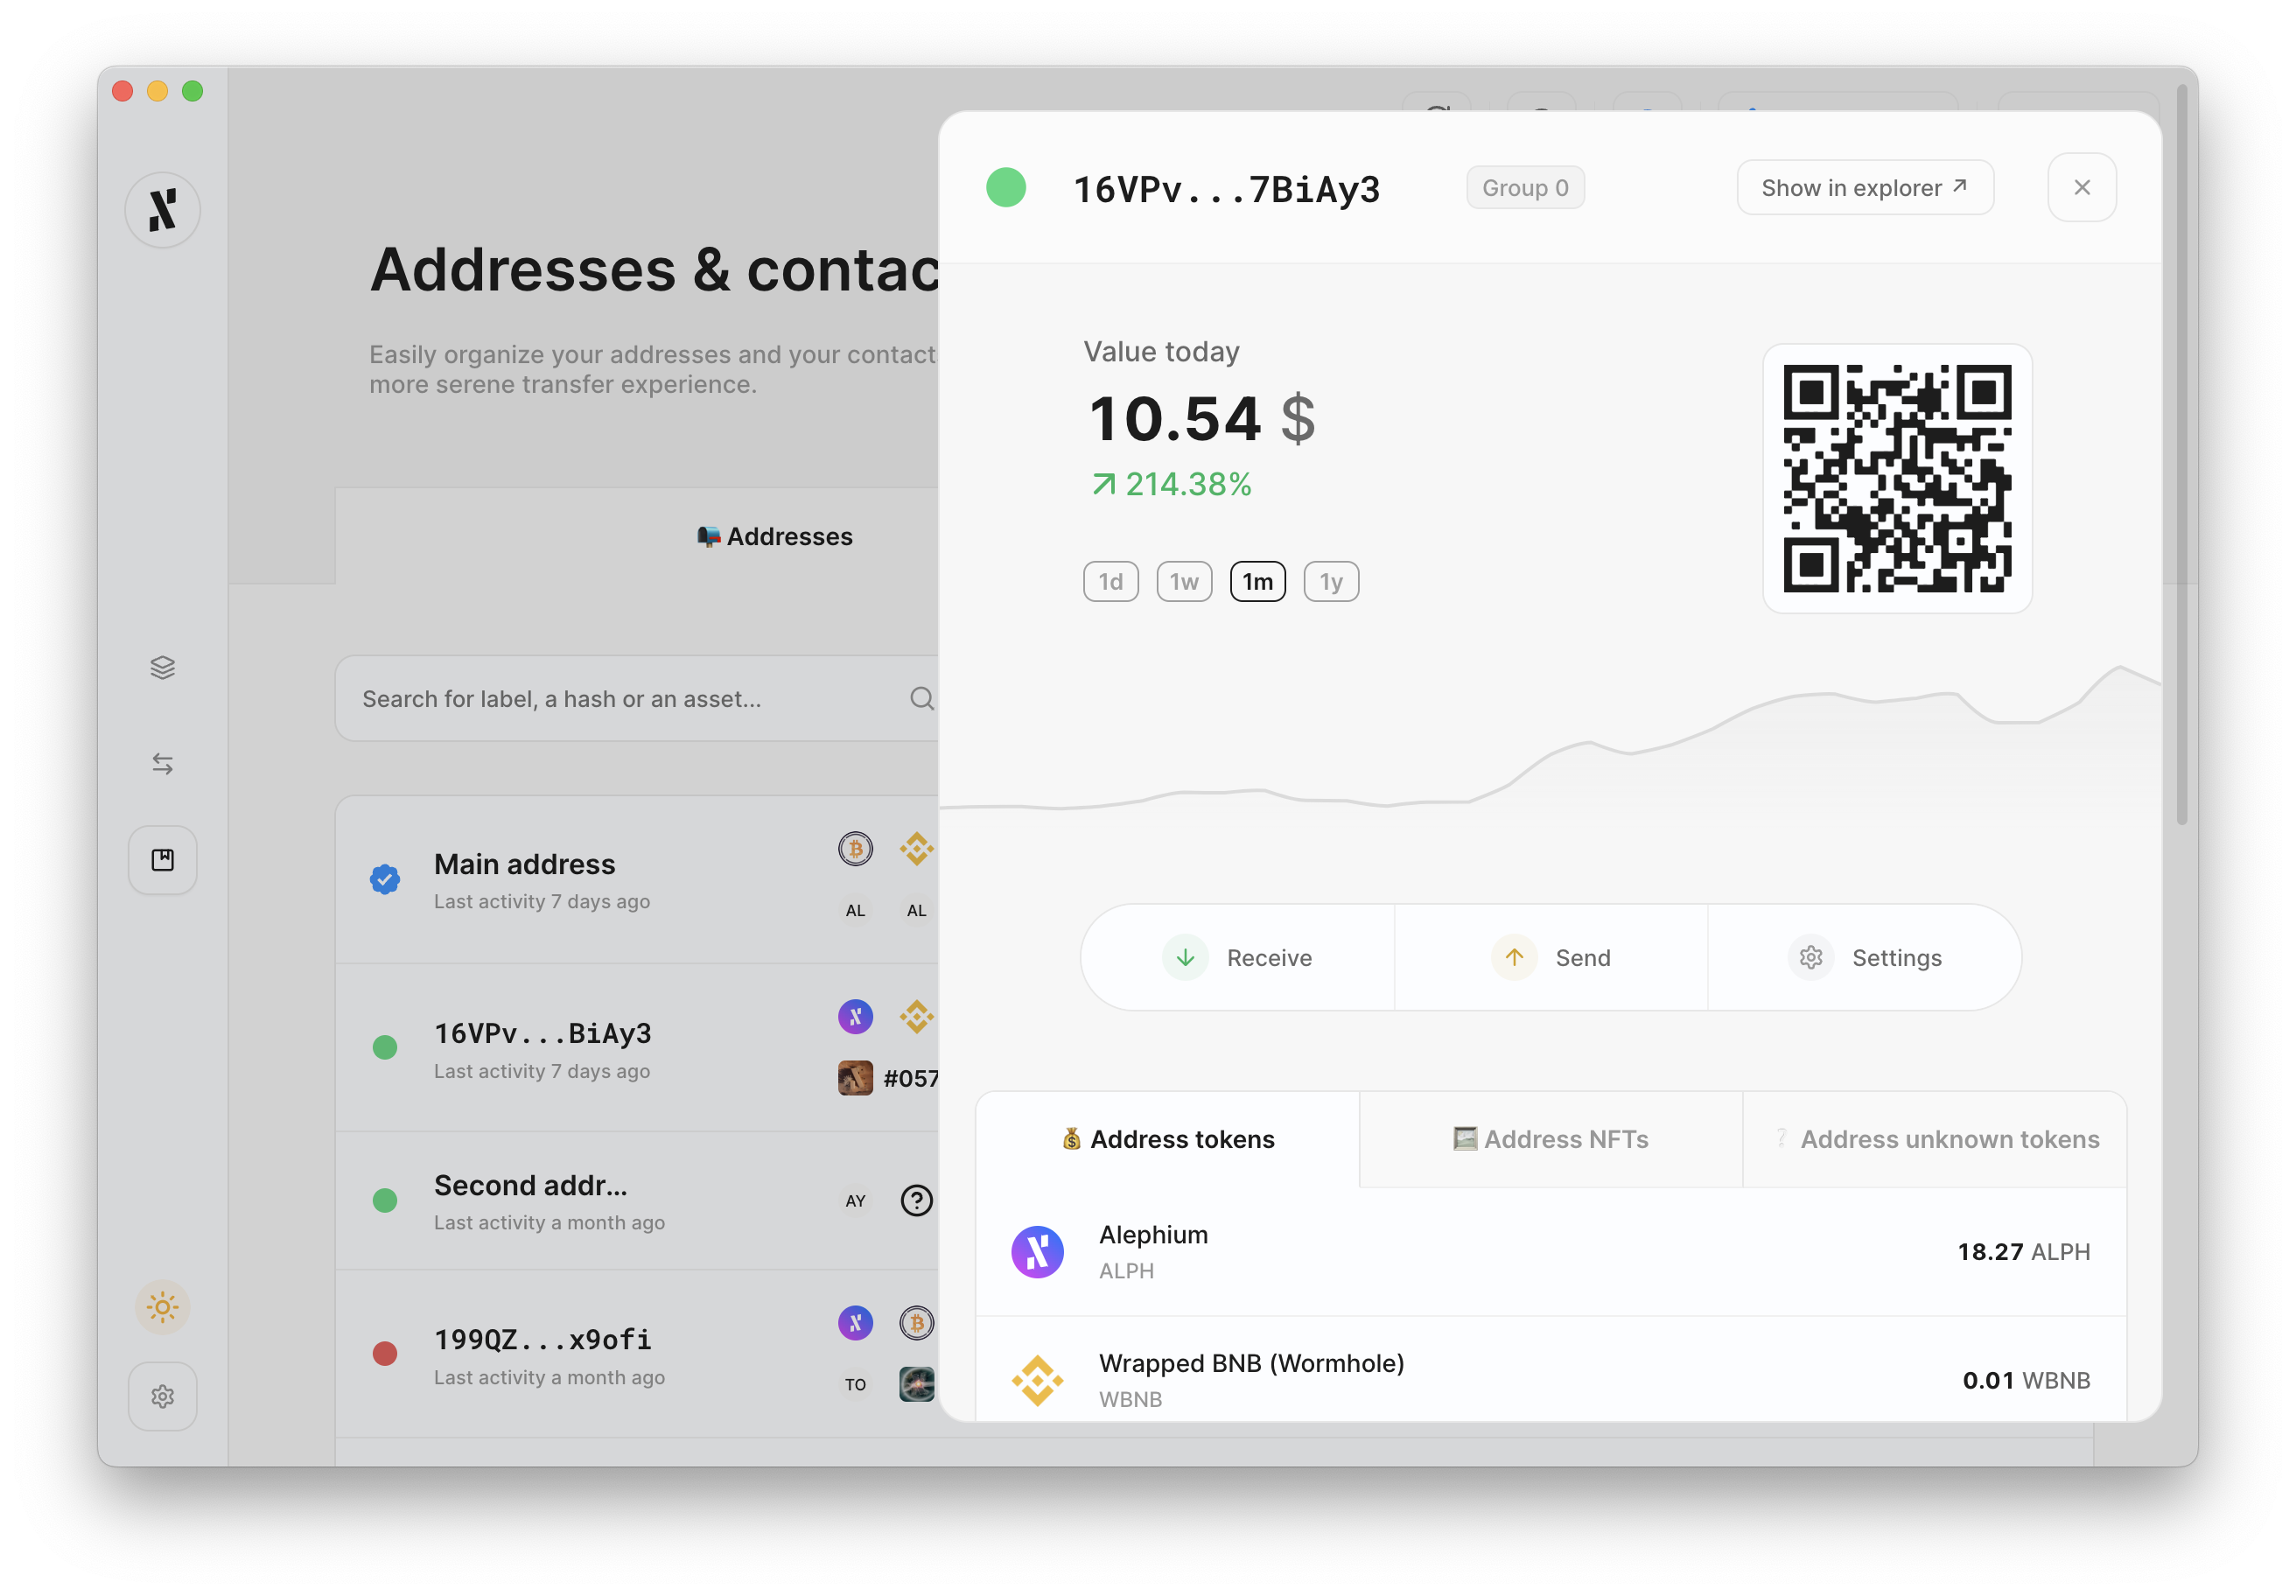
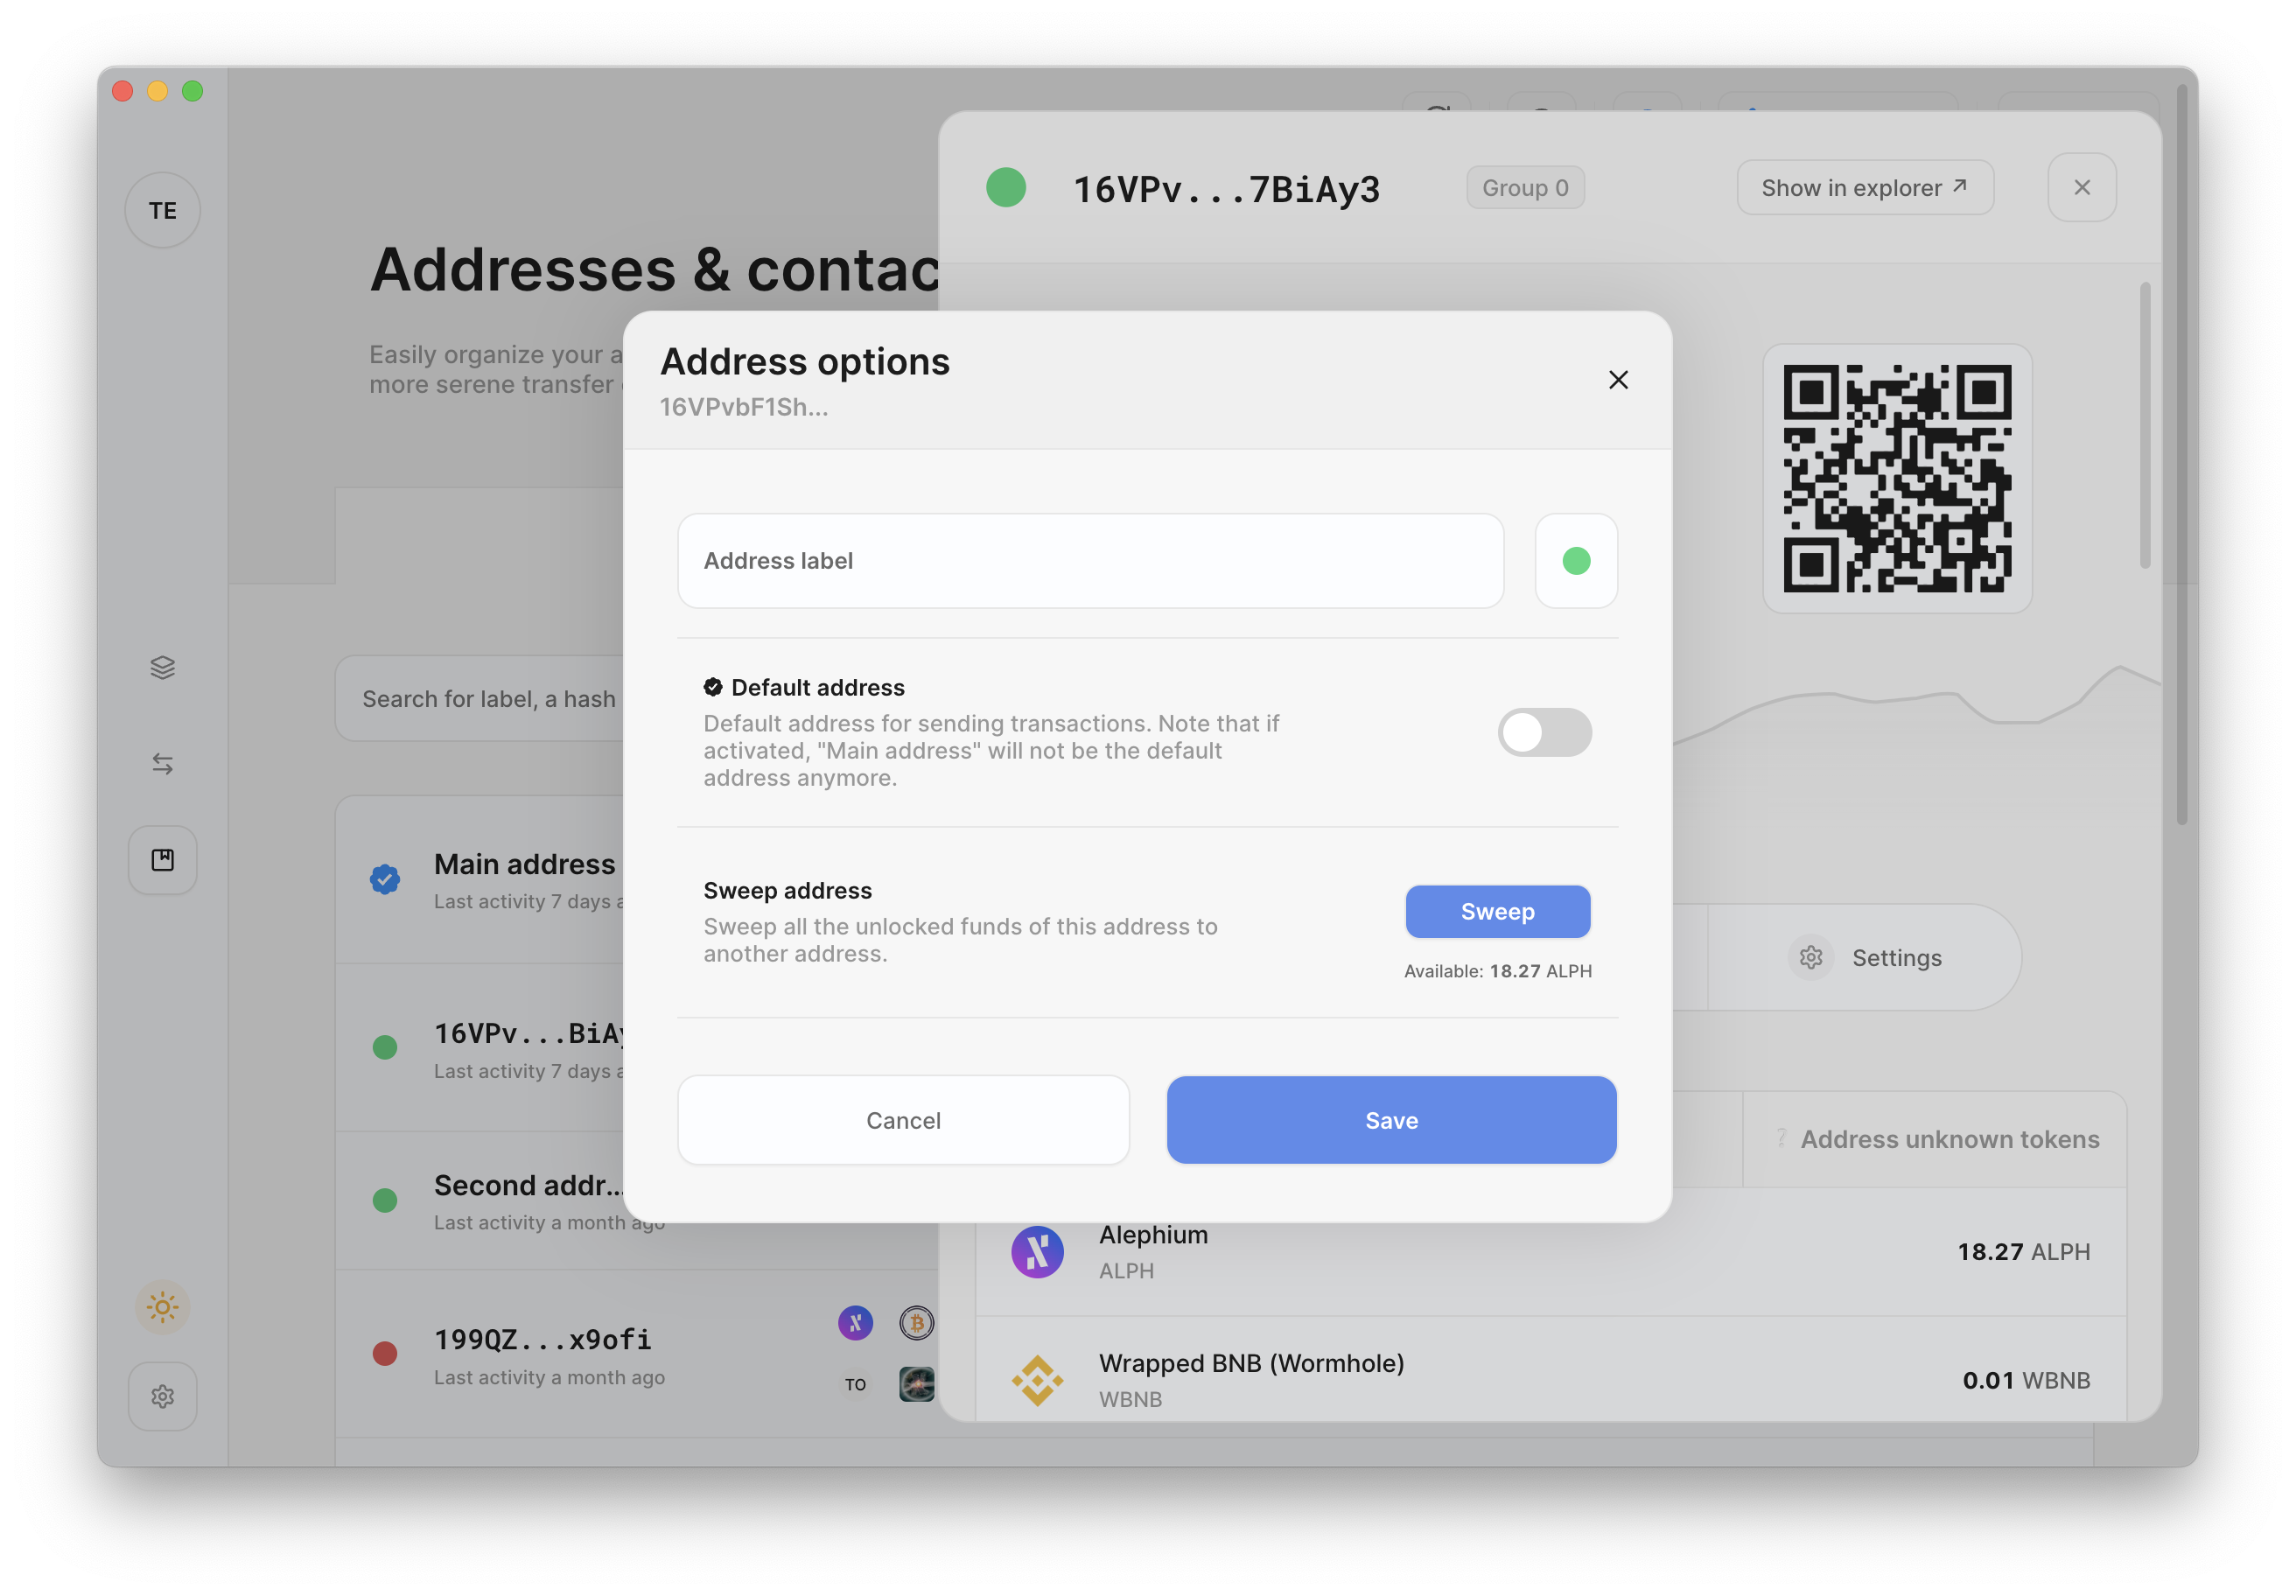
Using the Settings wheel at the top of the application, you will be able to edit the Address label, choose it as your default address or sweep all its unlocked funds to an address of your choice.
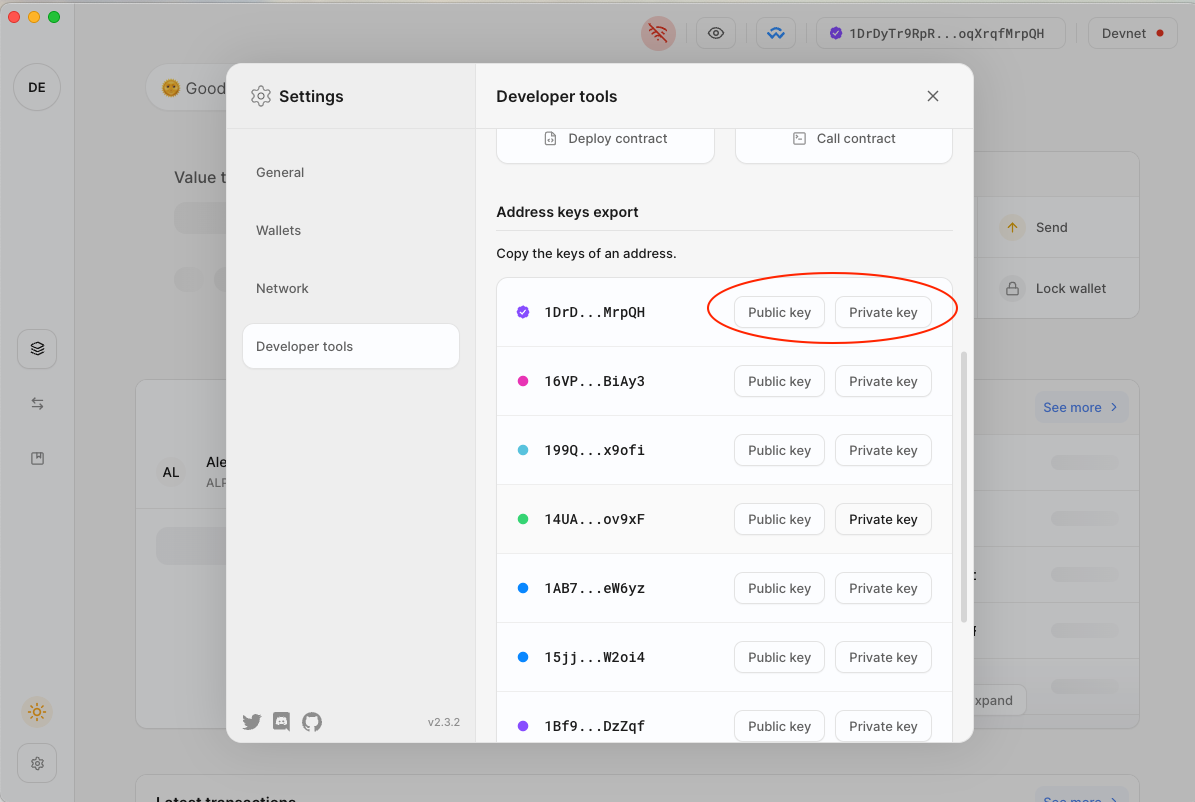
5. Export Public Key and Private Key