Extension Wallet for dApps
The Alephium extension wallet injects a global object
window.alephiumProviders.alephium into the dApps that the user
interacts with. dApps can use this object to authenticate the user,
request users account and communicate with the Alephium blockchain
such as fetching user balance, contract state and submitting
transactions, etc.
Basic Setup
To detect the window.alephiumProviders.alephium object, we recommend
to use the
@alephium/get-extension-wallet
package.
npm install --save @alephium/get-extension-wallet
The following code shows how to connect to the extension wallet using pure typescript:
import { getDefaultAlephiumWallet } from "@alephium/get-extension-wallet"

async function tryConnect() {
  // Returns the `window.alephiumProviders.alephium` object after user selects
  // the extension wallet.
  const windowAlephium = await getDefaultAlephiumWallet()
  // Authenticate user to the current dApp, return the selected account
  const selectedAccount = await windowAlephium?.enable()

  if (windowAlephium && selectedAccount) {
    // From here, you can execute various transactions:
    //
    // windowAlephium.signAndSubmitTransferTx(...)
    // windowAlephium.signAndSubmitDeployContractTx(...)
    // windowAlephium.signAndSubmitExecuteScriptTx(...)
    // ...
  }
}
Users will be prompted to connect to the current dApp when
windowAlephium?.enable() method is called:
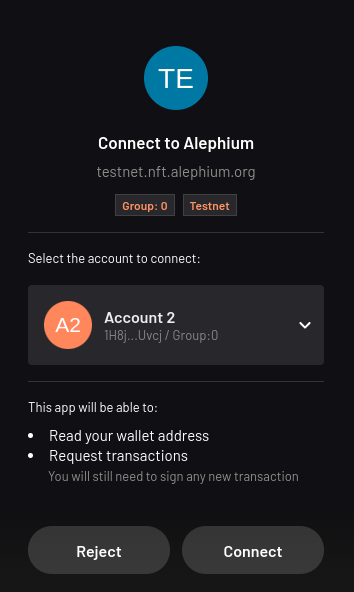
After user clicks the Connect button, dApp is connected with users
extension wallet.
Web3 React
For dApps built with react, @alephium/web3-react offers an easier way to authenticate with dApps using wallets, including extension wallet.
npm install --save @alephium/web3-react
A minimal example is shown below:
const App = () => {
  return (
    <AlephiumWalletProvider theme="retro">
      /* Your App */
      <AlephiumConnectButton />
    </AlephiumWalletProvider>
  );
This will place a button in your dApp with the retro built-in
theme. Once user clicks the button, a pop-up window will show up to
ask user to select a wallet:
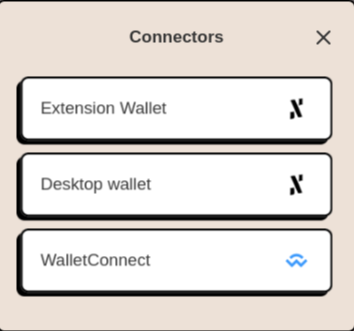
If user selects Extension Wallet, user will again be prompted to
connect to the current dApp. After user clicks the Connect button,
dApp is connected with users extension wallet.
Please refer to the nextjs-template repo for a working and more complete example.
Sign Transactions
windowAlephium object implements the
InteractiveSignerProvider,
which exposes the following methods for transaction signing:
abstract signAndSubmitTransferTx(params: SignTransferTxParams): Promise<SignTransferTxResult>
abstract signAndSubmitDeployContractTx(params: SignDeployContractTxParams): Promise<SignDeployContractTxResult>
abstract signAndSubmitExecuteScriptTx(params: SignExecuteScriptTxParams): Promise<SignExecuteScriptTxResult>
abstract signAndSubmitUnsignedTx(params: SignUnsignedTxParams): Promise<SignUnsignedTxResult>
abstract signUnsignedTx(params: SignUnsignedTxParams): Promise<SignUnsignedTxResult>
// The message will be prefixed with 'Alephium Signed Message: ' before signing
// so that the resulted signature cannot be reused for building transactions.
abstract signMessage(params: SignMessageParams): Promise<SignMessageResult>
When any of these method is executed, extension wallet will provide neccessary information depending on the type of the transaction and prompt user for signature.
The following is an example of a transaction for token transfer: user
is transferring 2 TokenFaucet token from Salary account to
Saving account.
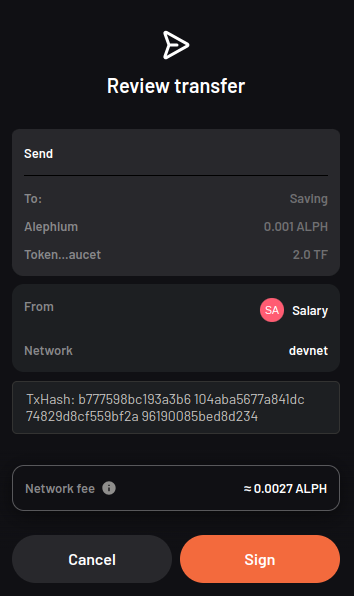
After user clicks the Sign button, the transction will be signed and
submitted to the Alephium blockchain by the extension wallet.